
If you are a current WinMax user, visited the Hurco booth at IMTS 2026, or caught any of the short reels on social media about the new MAX6 control, you may have come away a little overwhelmed. There are a lot of visual changes. It is fair to wonder whether the familiarity and easy navigation you rely on with WinMax survived the redesign.
Here is the short answer: MAX6 is still WinMax at its core. Everything you are used to is still there and behaves the same way. There is just a lot more to discover. This article walks through the screens you use every day and shows you where things moved, what got easier, and what is new.
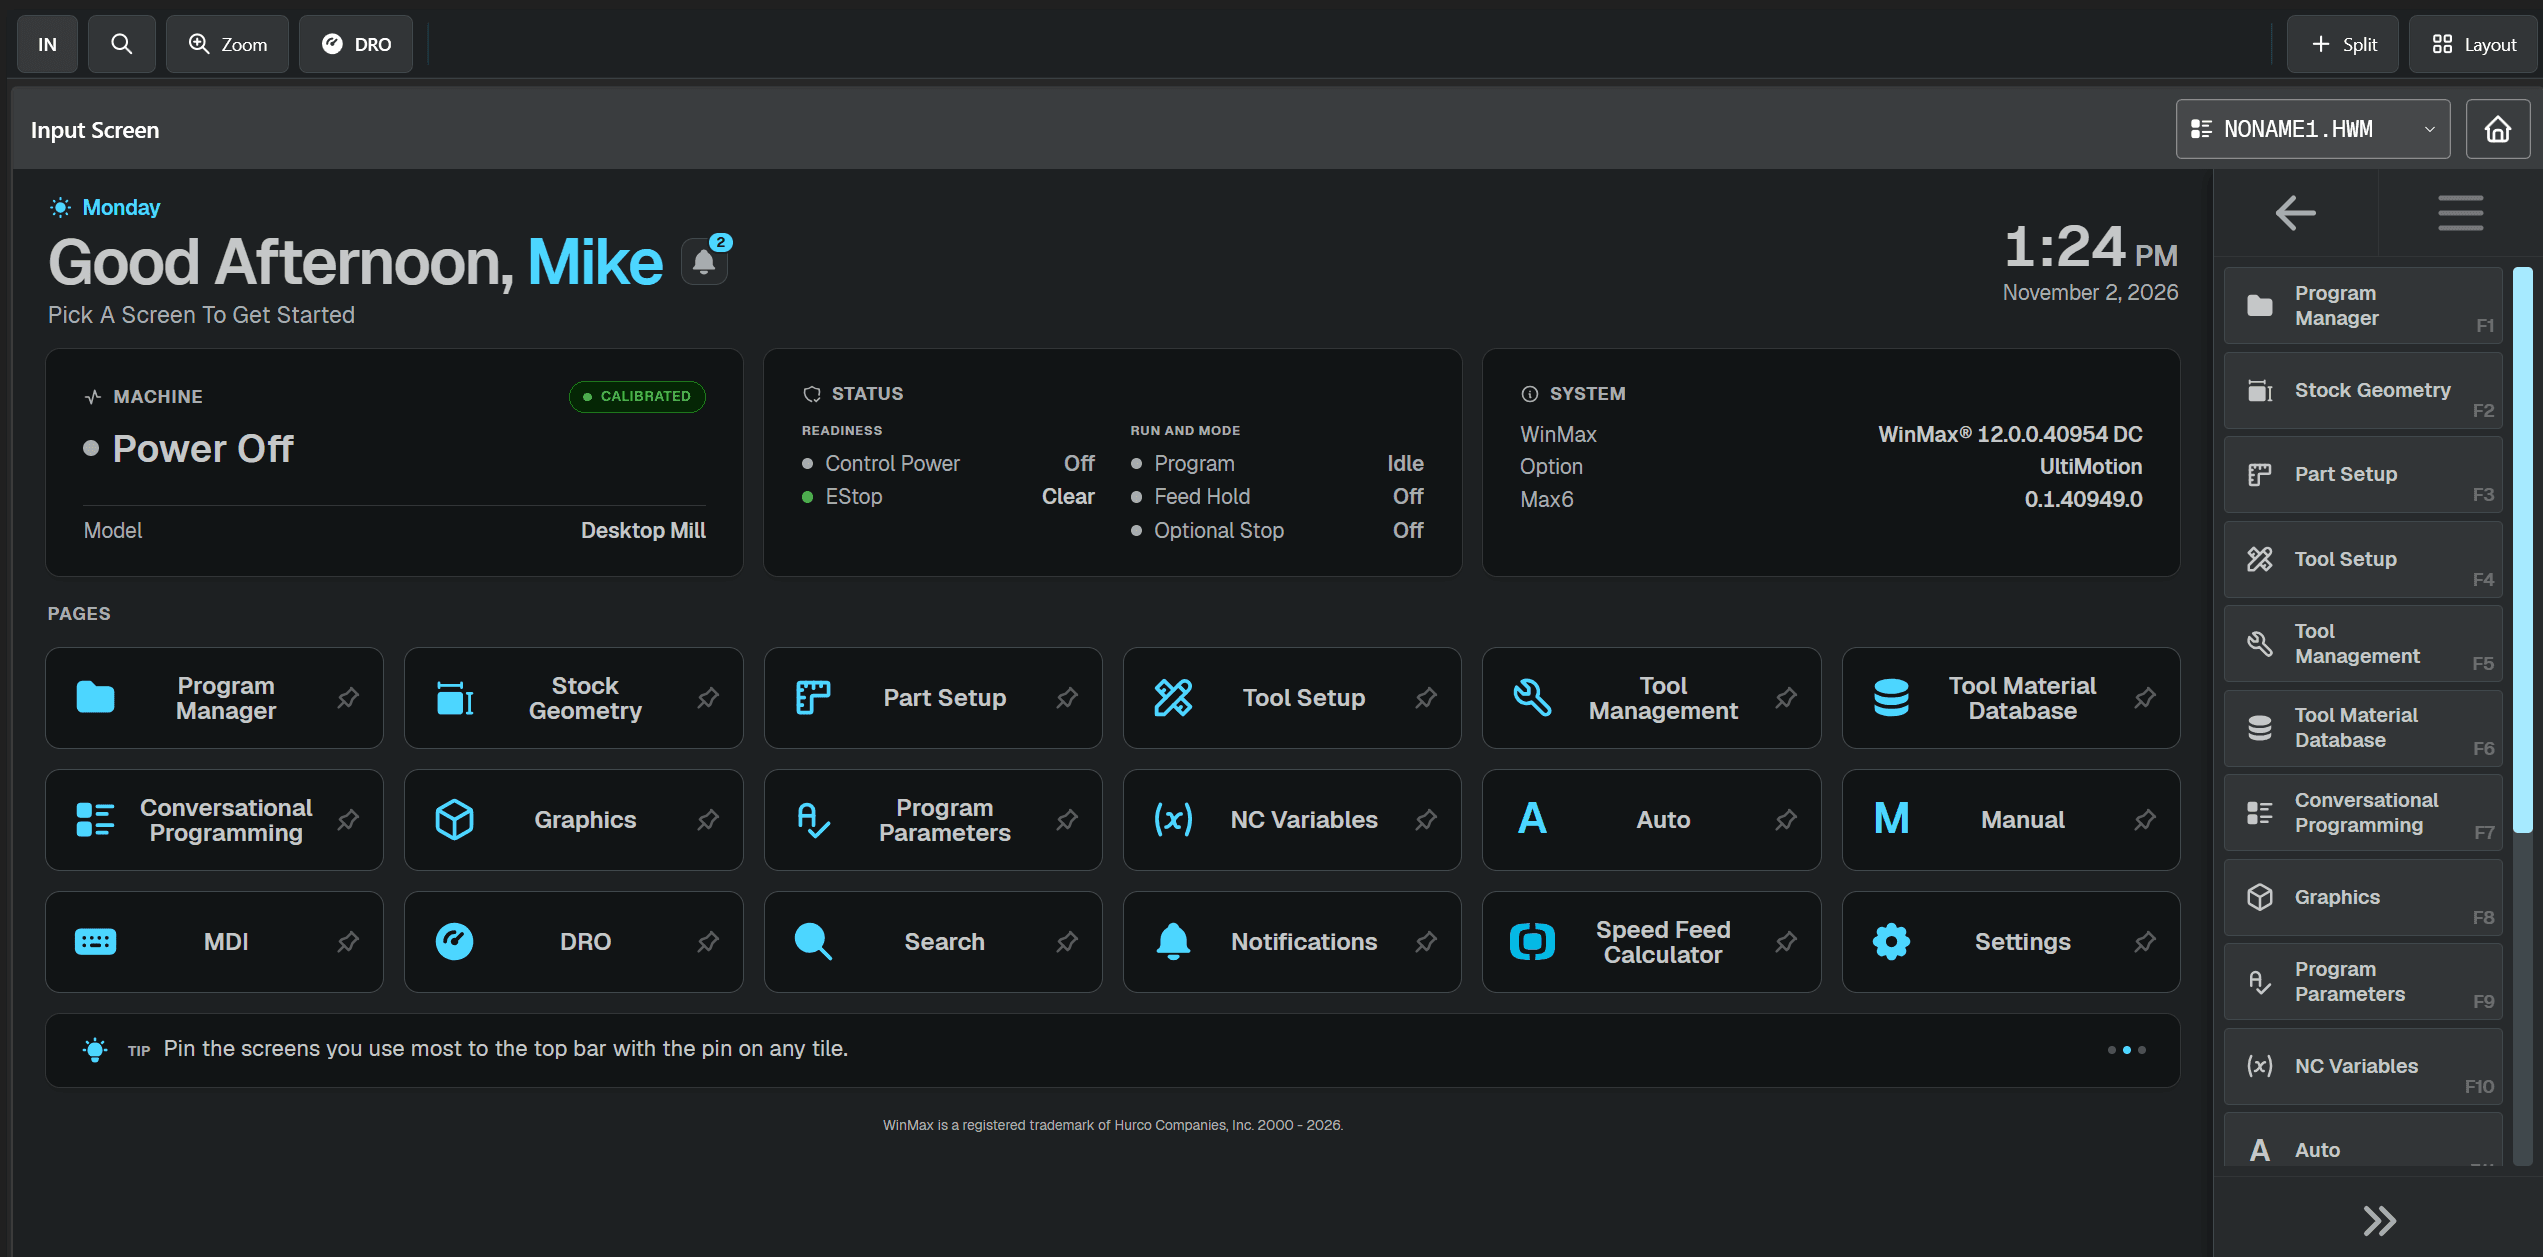
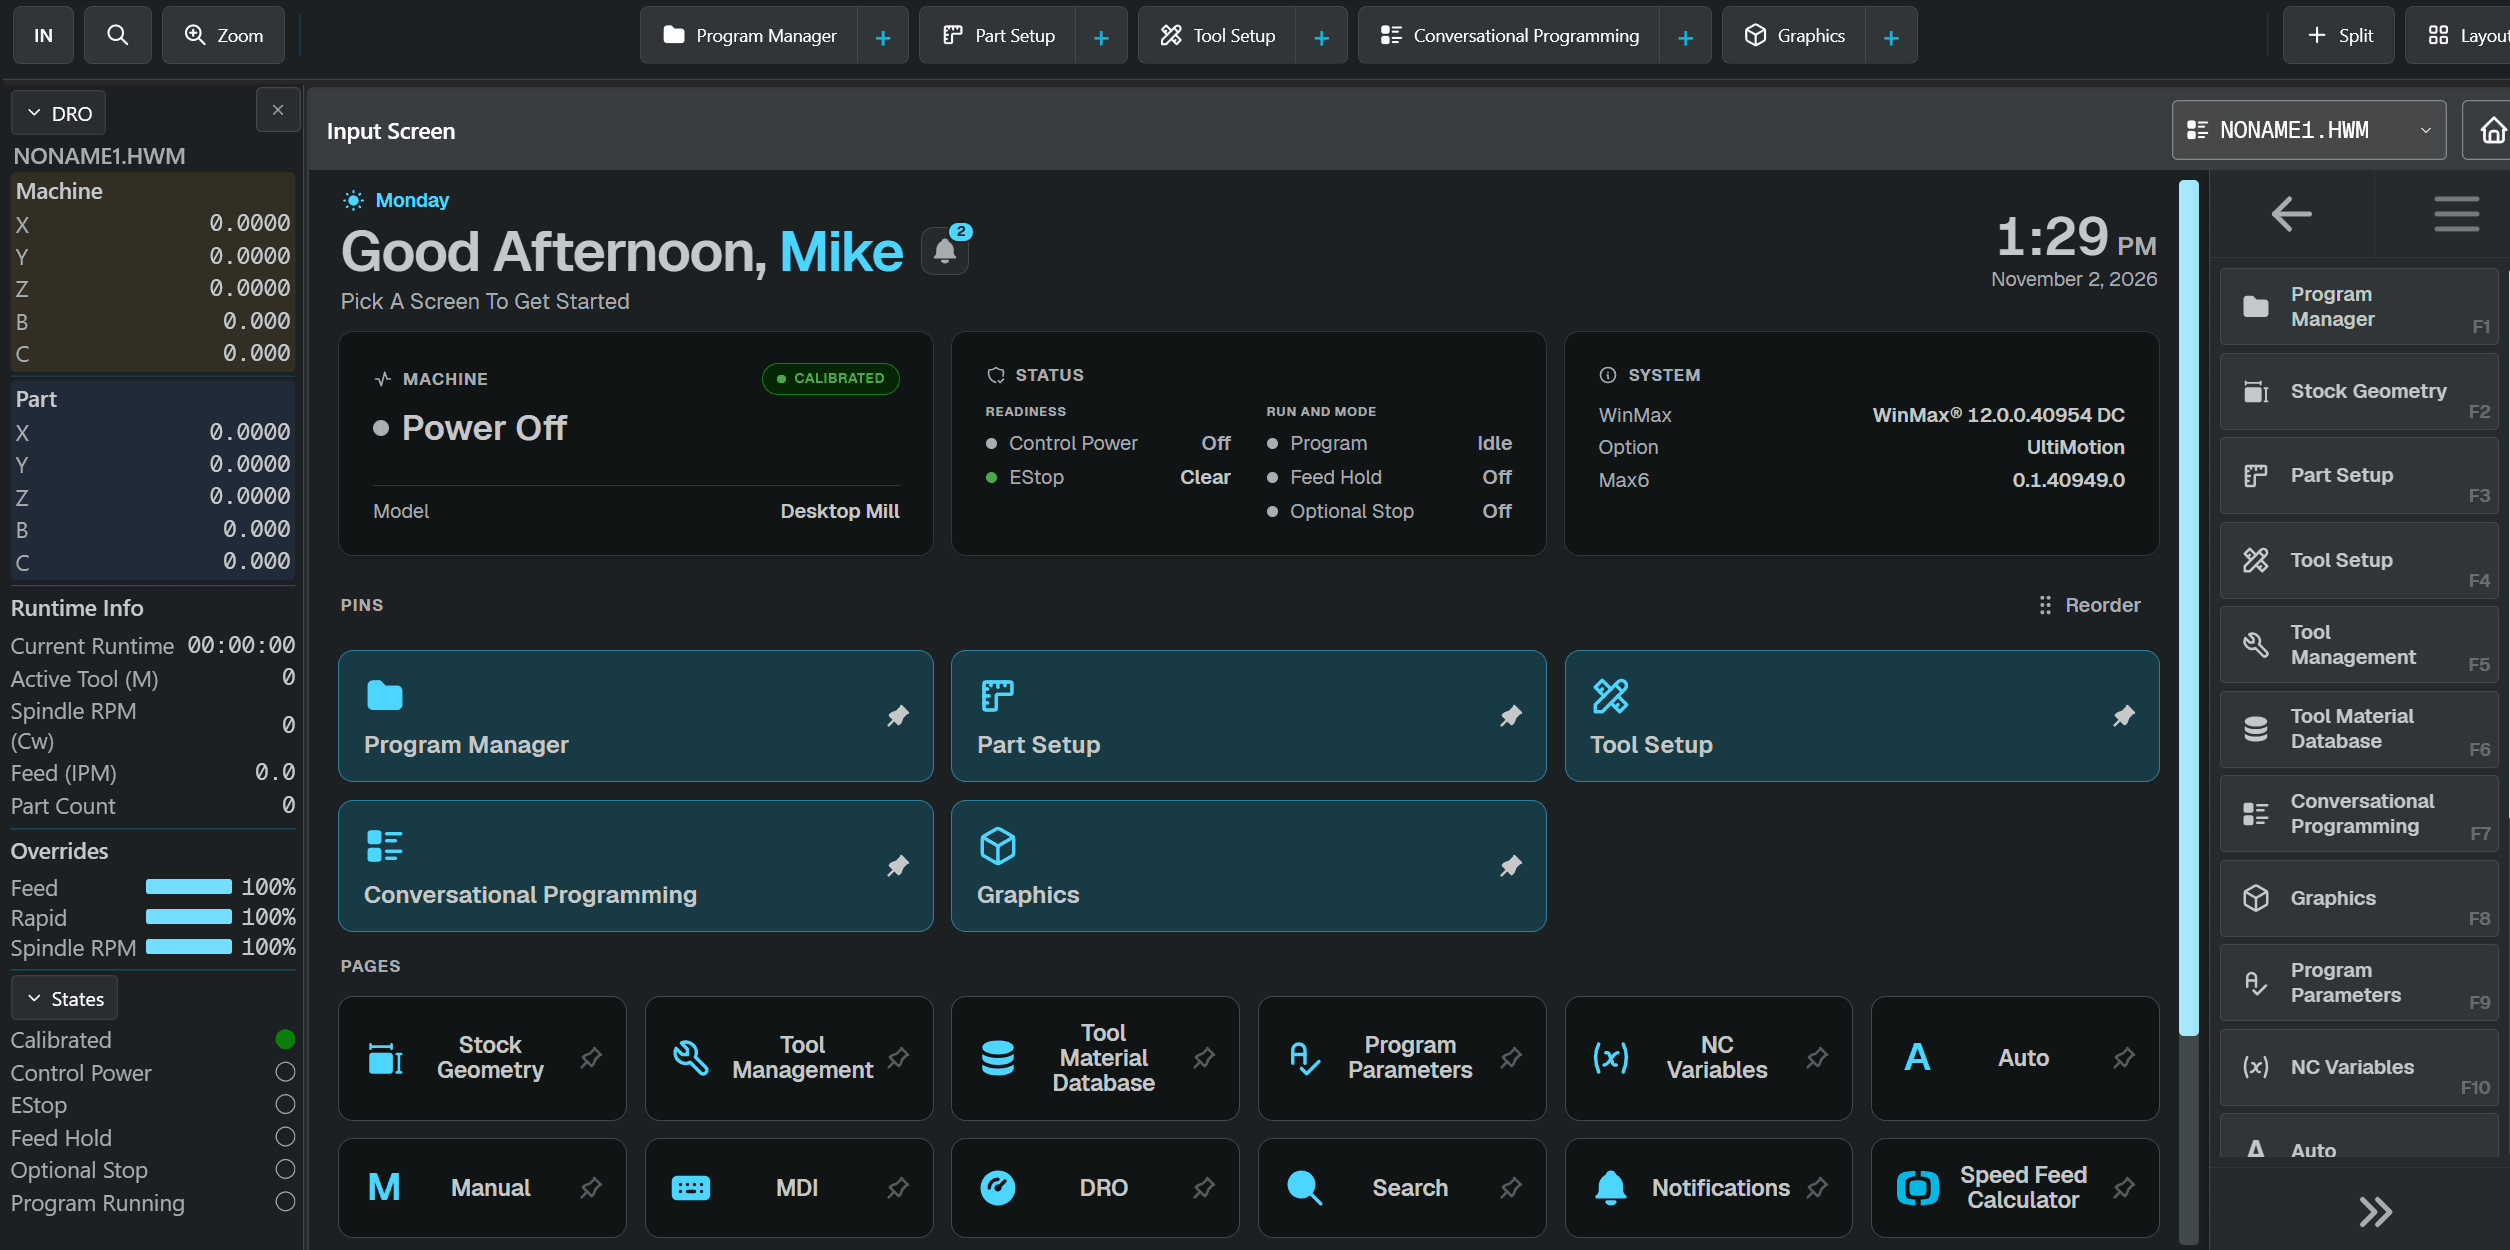
Let's start with the heart of WinMax, the Input screen. It is still there and still the home base for navigating the rest of the control. The difference is how you get to it. Instead of a control panel button, there is a house icon in the upper right corner of every screen. Press it and you are back at Input.
Look around the screen and you will see all the familiar softkeys, plus plenty of additions. Including an MDI, which I will cover in a future article about new features.
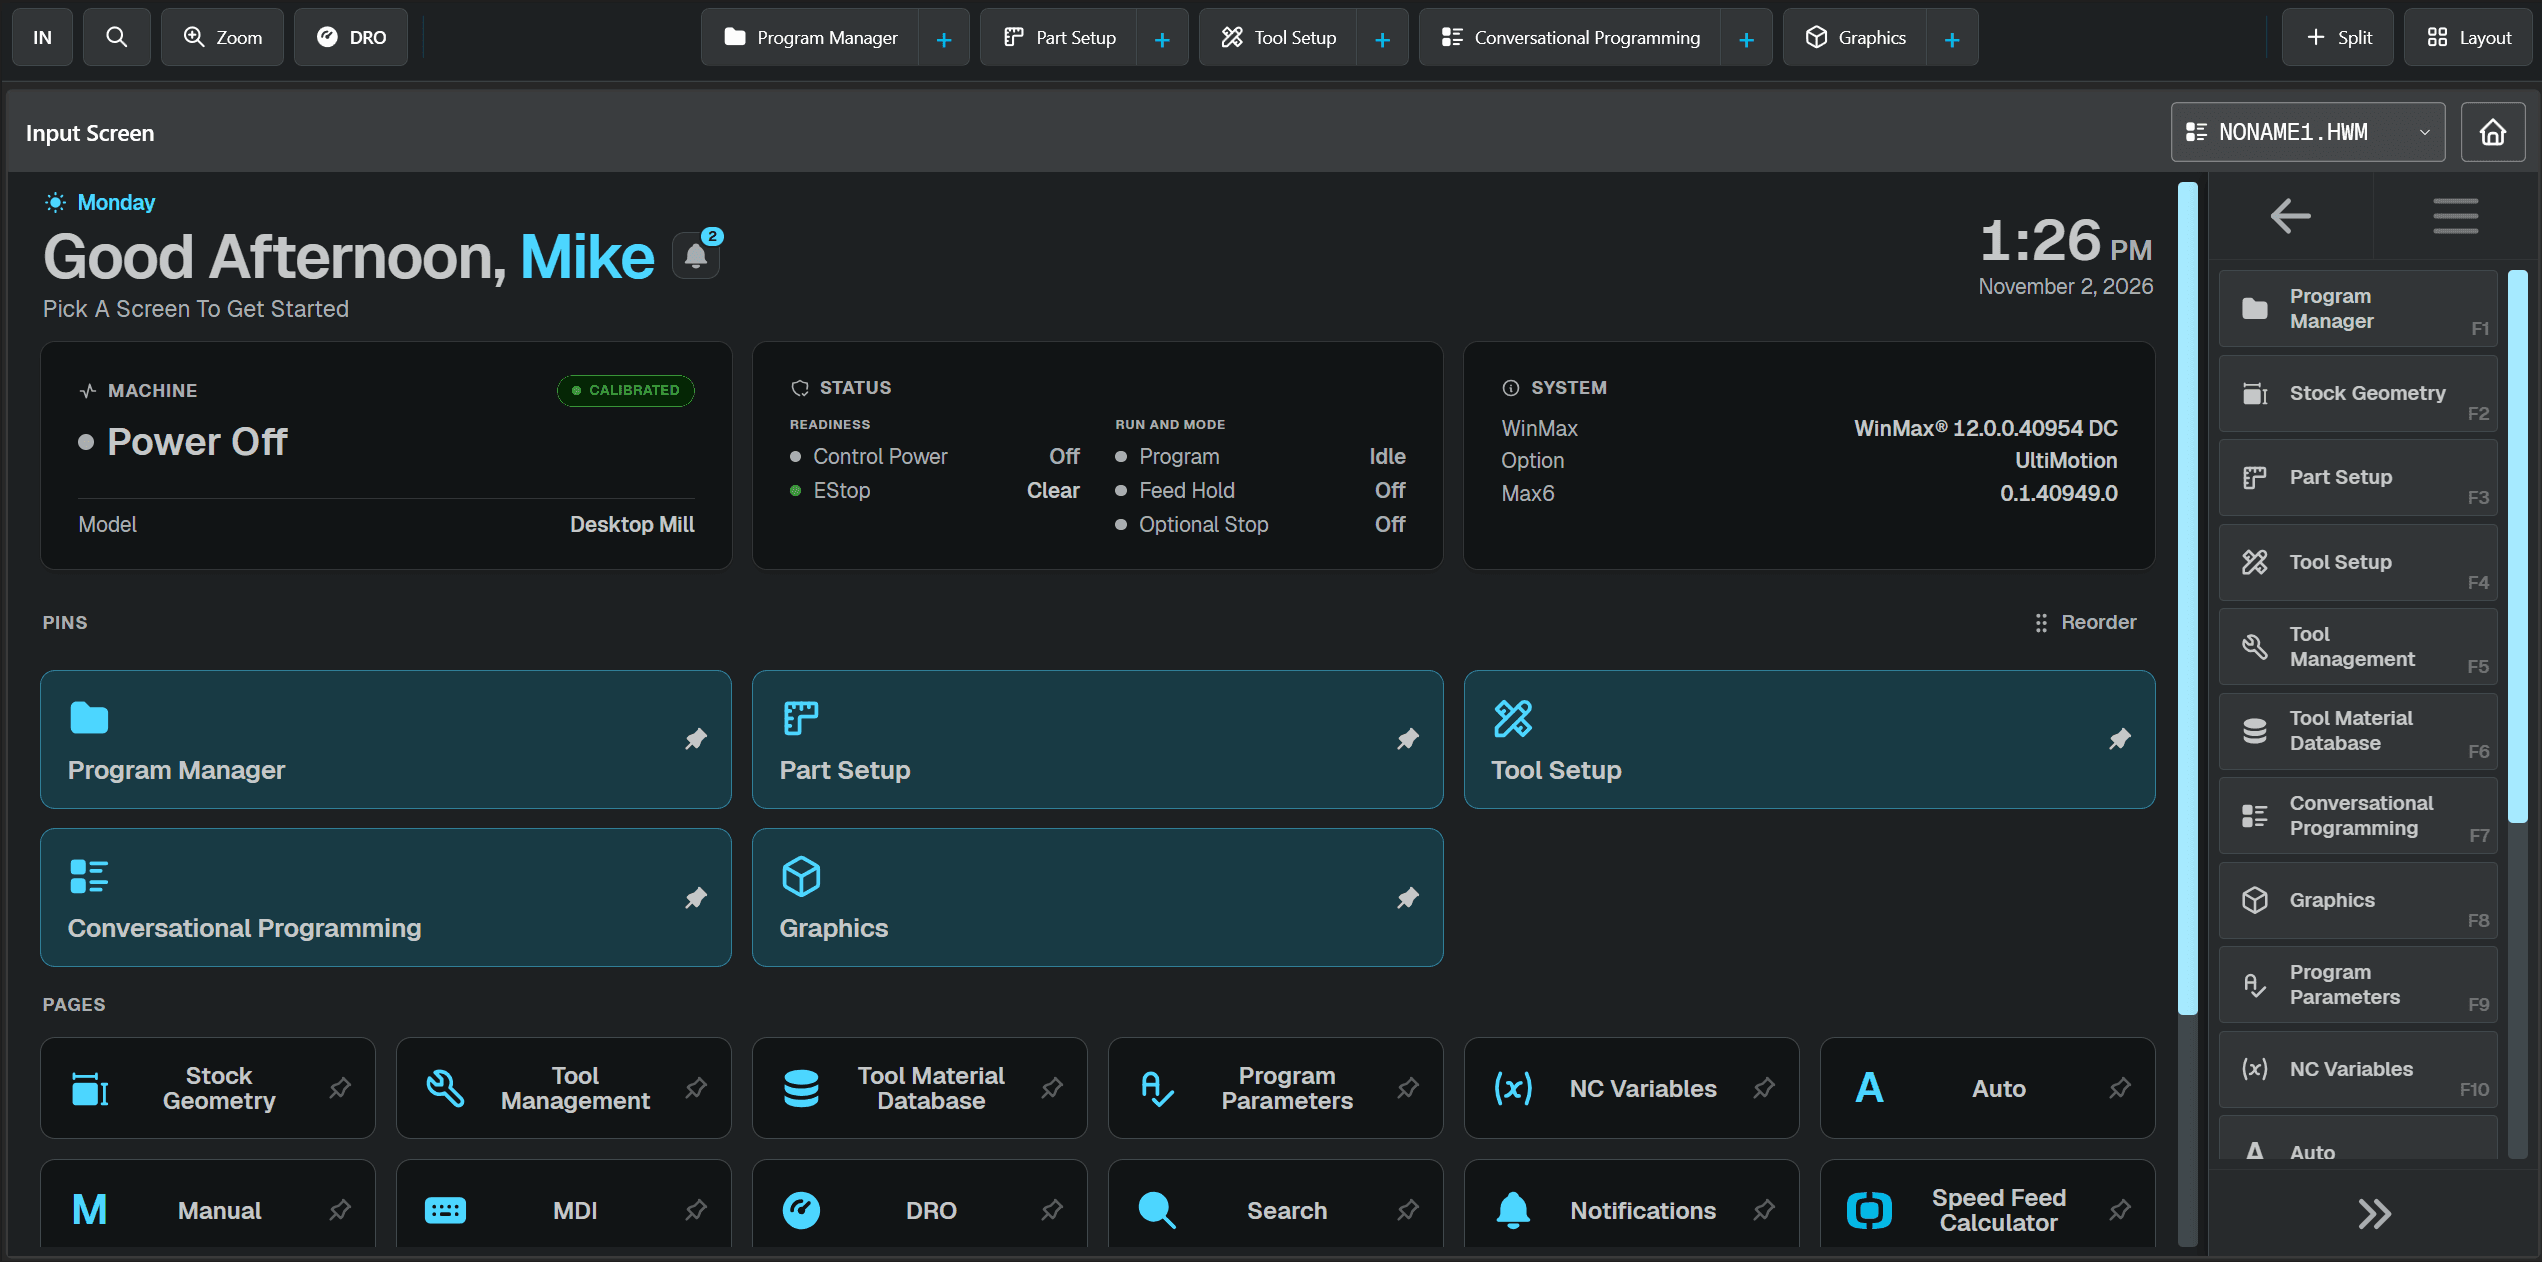
One of the best things about the new interface is the ability to pin any softkey to the top of the control screen. Pinned icons stay there no matter what screen you are on, so your most-used screens are always one touch away.
To pin a softkey, press the small pin icon next to its description. That link is added to the middle of the Input screen and as an icon along the top bar. Tap any pinned link and you jump straight to that screen.
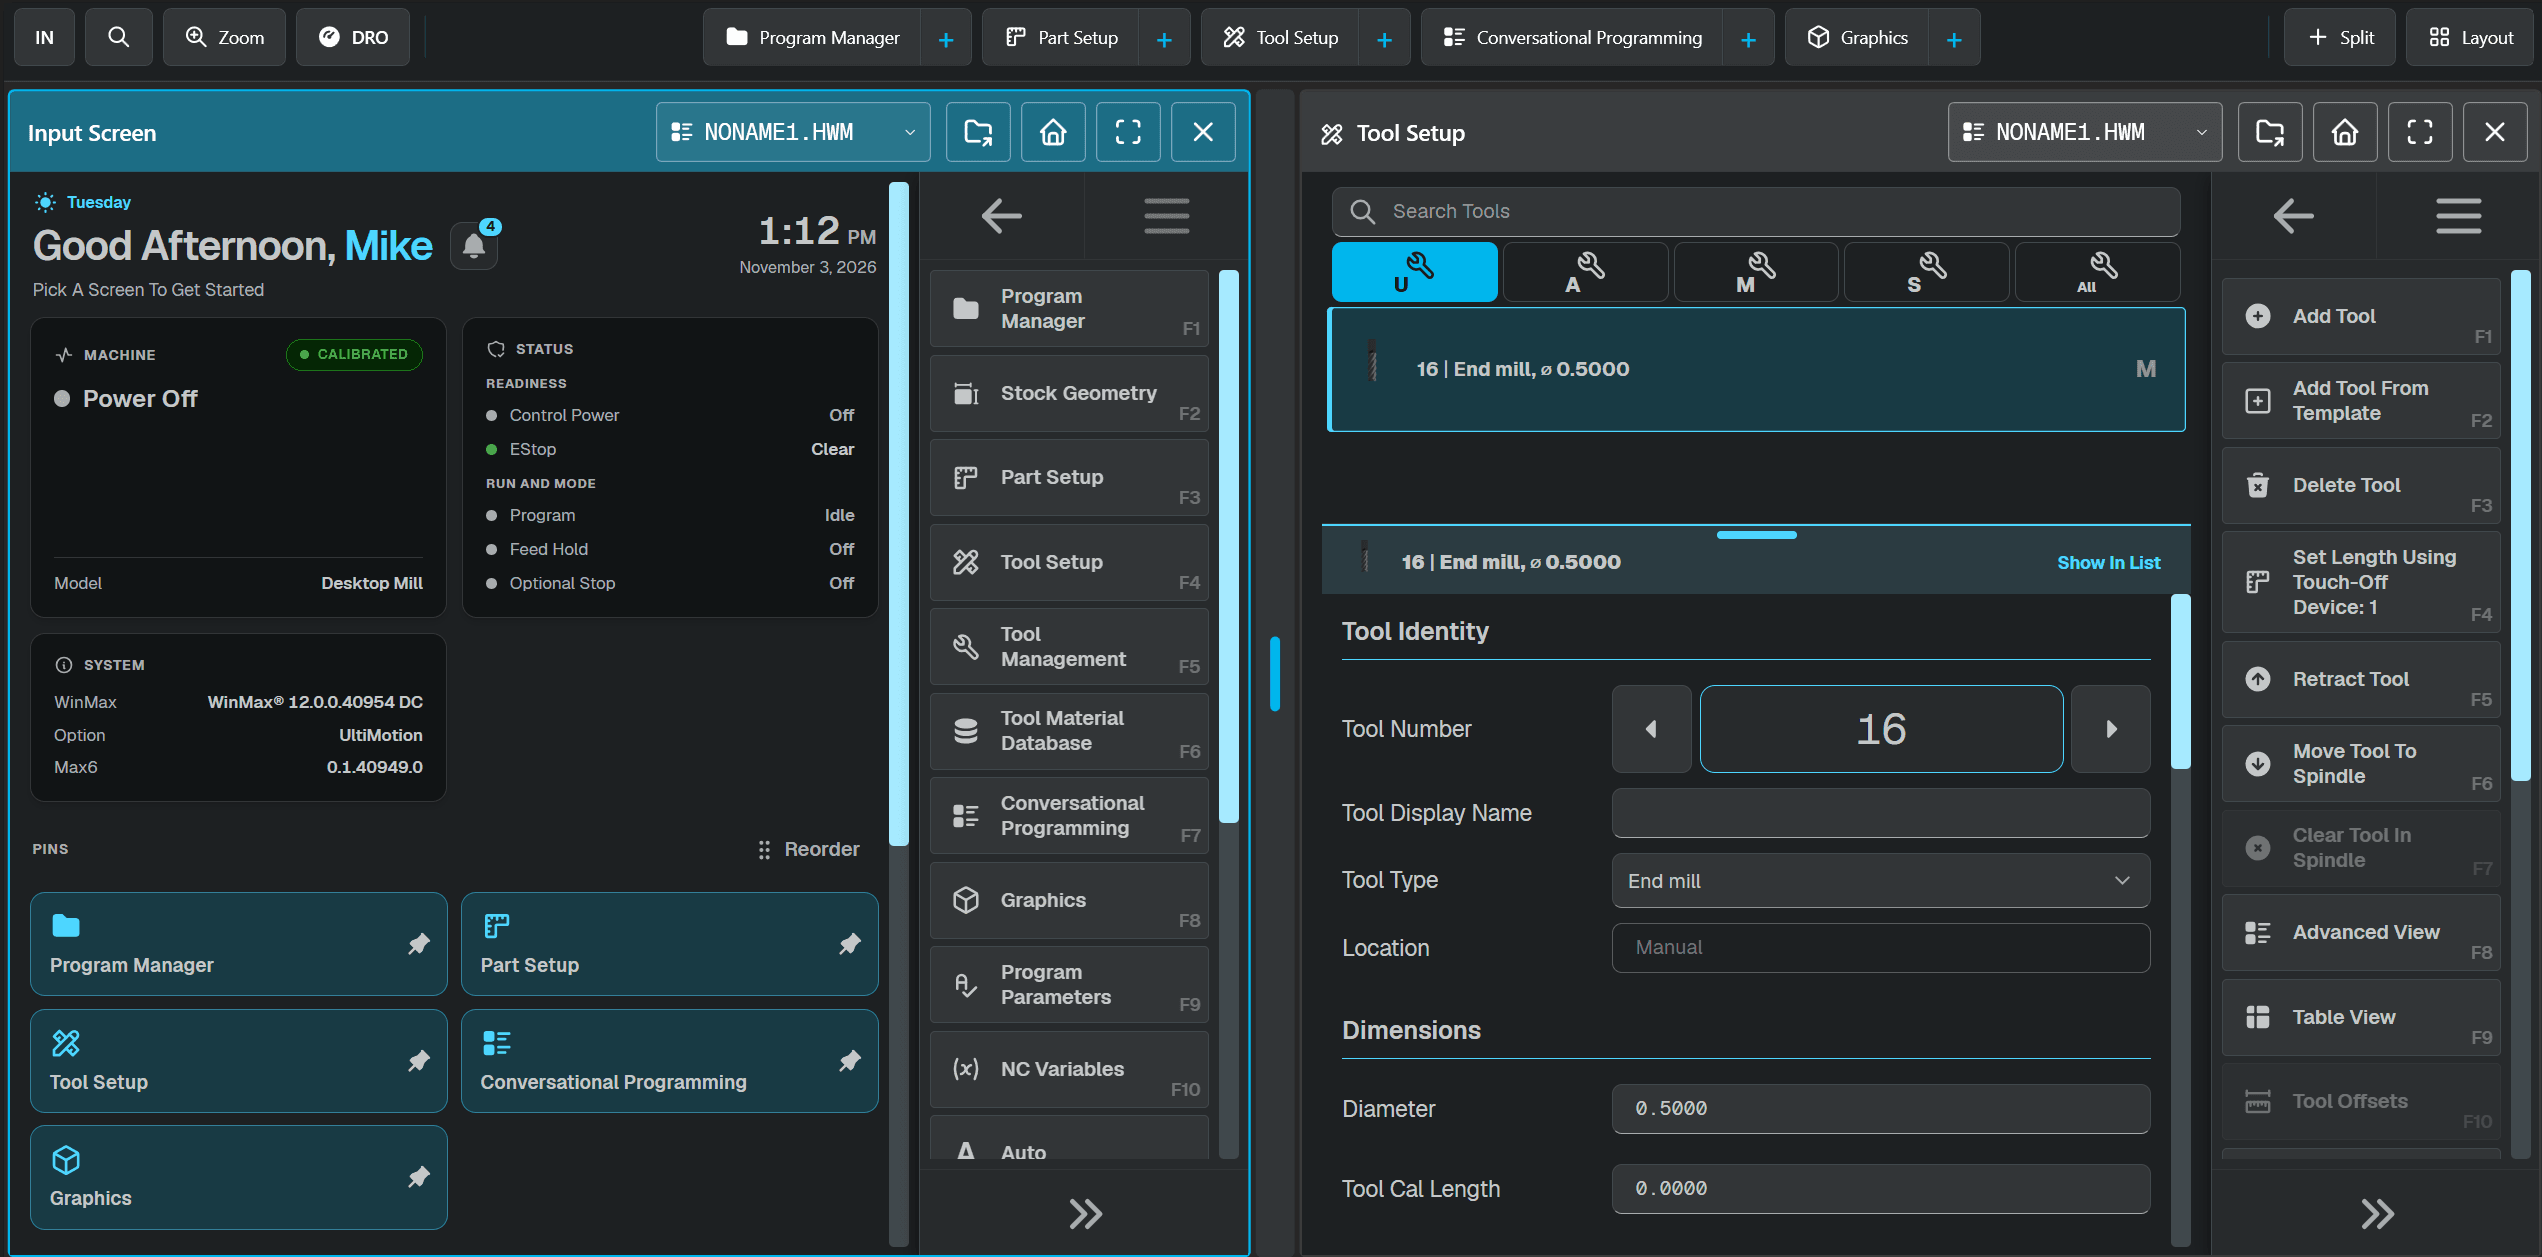
Next to each softkey description you will also notice a small blue plus sign. Press it and MAX6 opens a split screen. Your current screen stays open and the new one appears right beside it. You can drag the screens with your finger to change their order.
Here is what it looks like when I press the plus next to Tool Setup while viewing the Input screen. Both are displayed, and either one can be closed with the X in its upper right corner.
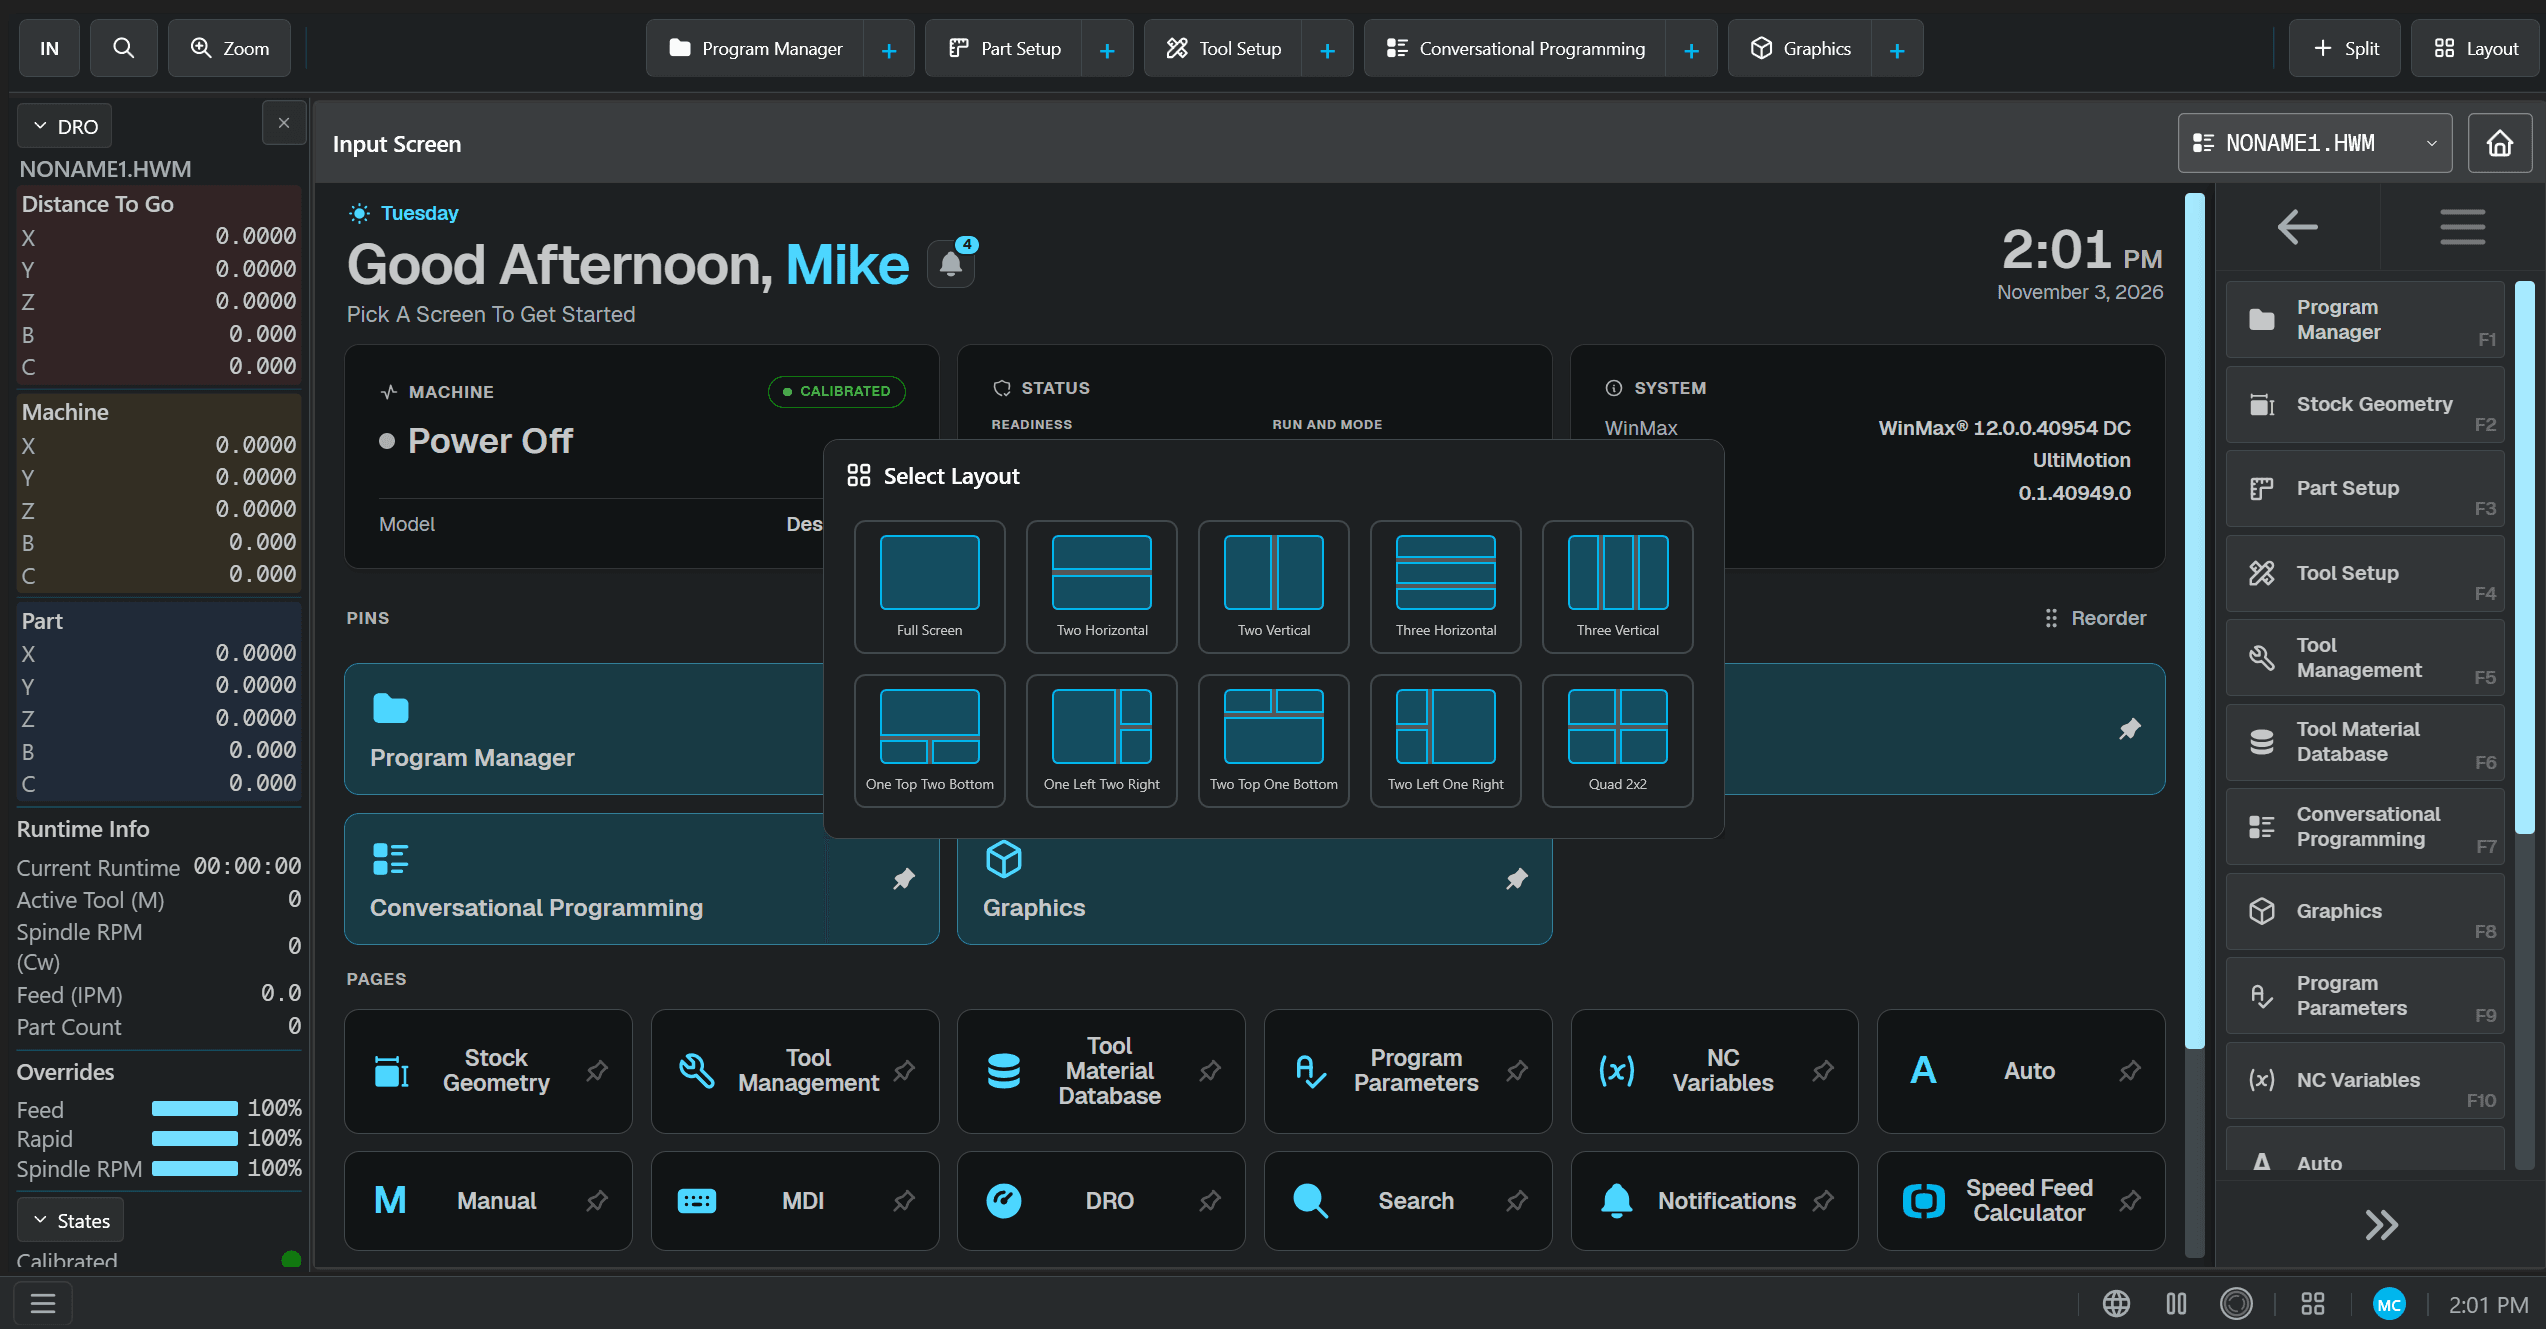
You are not limited to two screens. MAX6 can display up to four at once, and you choose which screens appear and how they are arranged. Select the Layout icon in the top right corner and pick one of eight layout options. Then highlight each pane and choose the screen you want in it. You can also drag panes around to reorder them within the layout you selected.
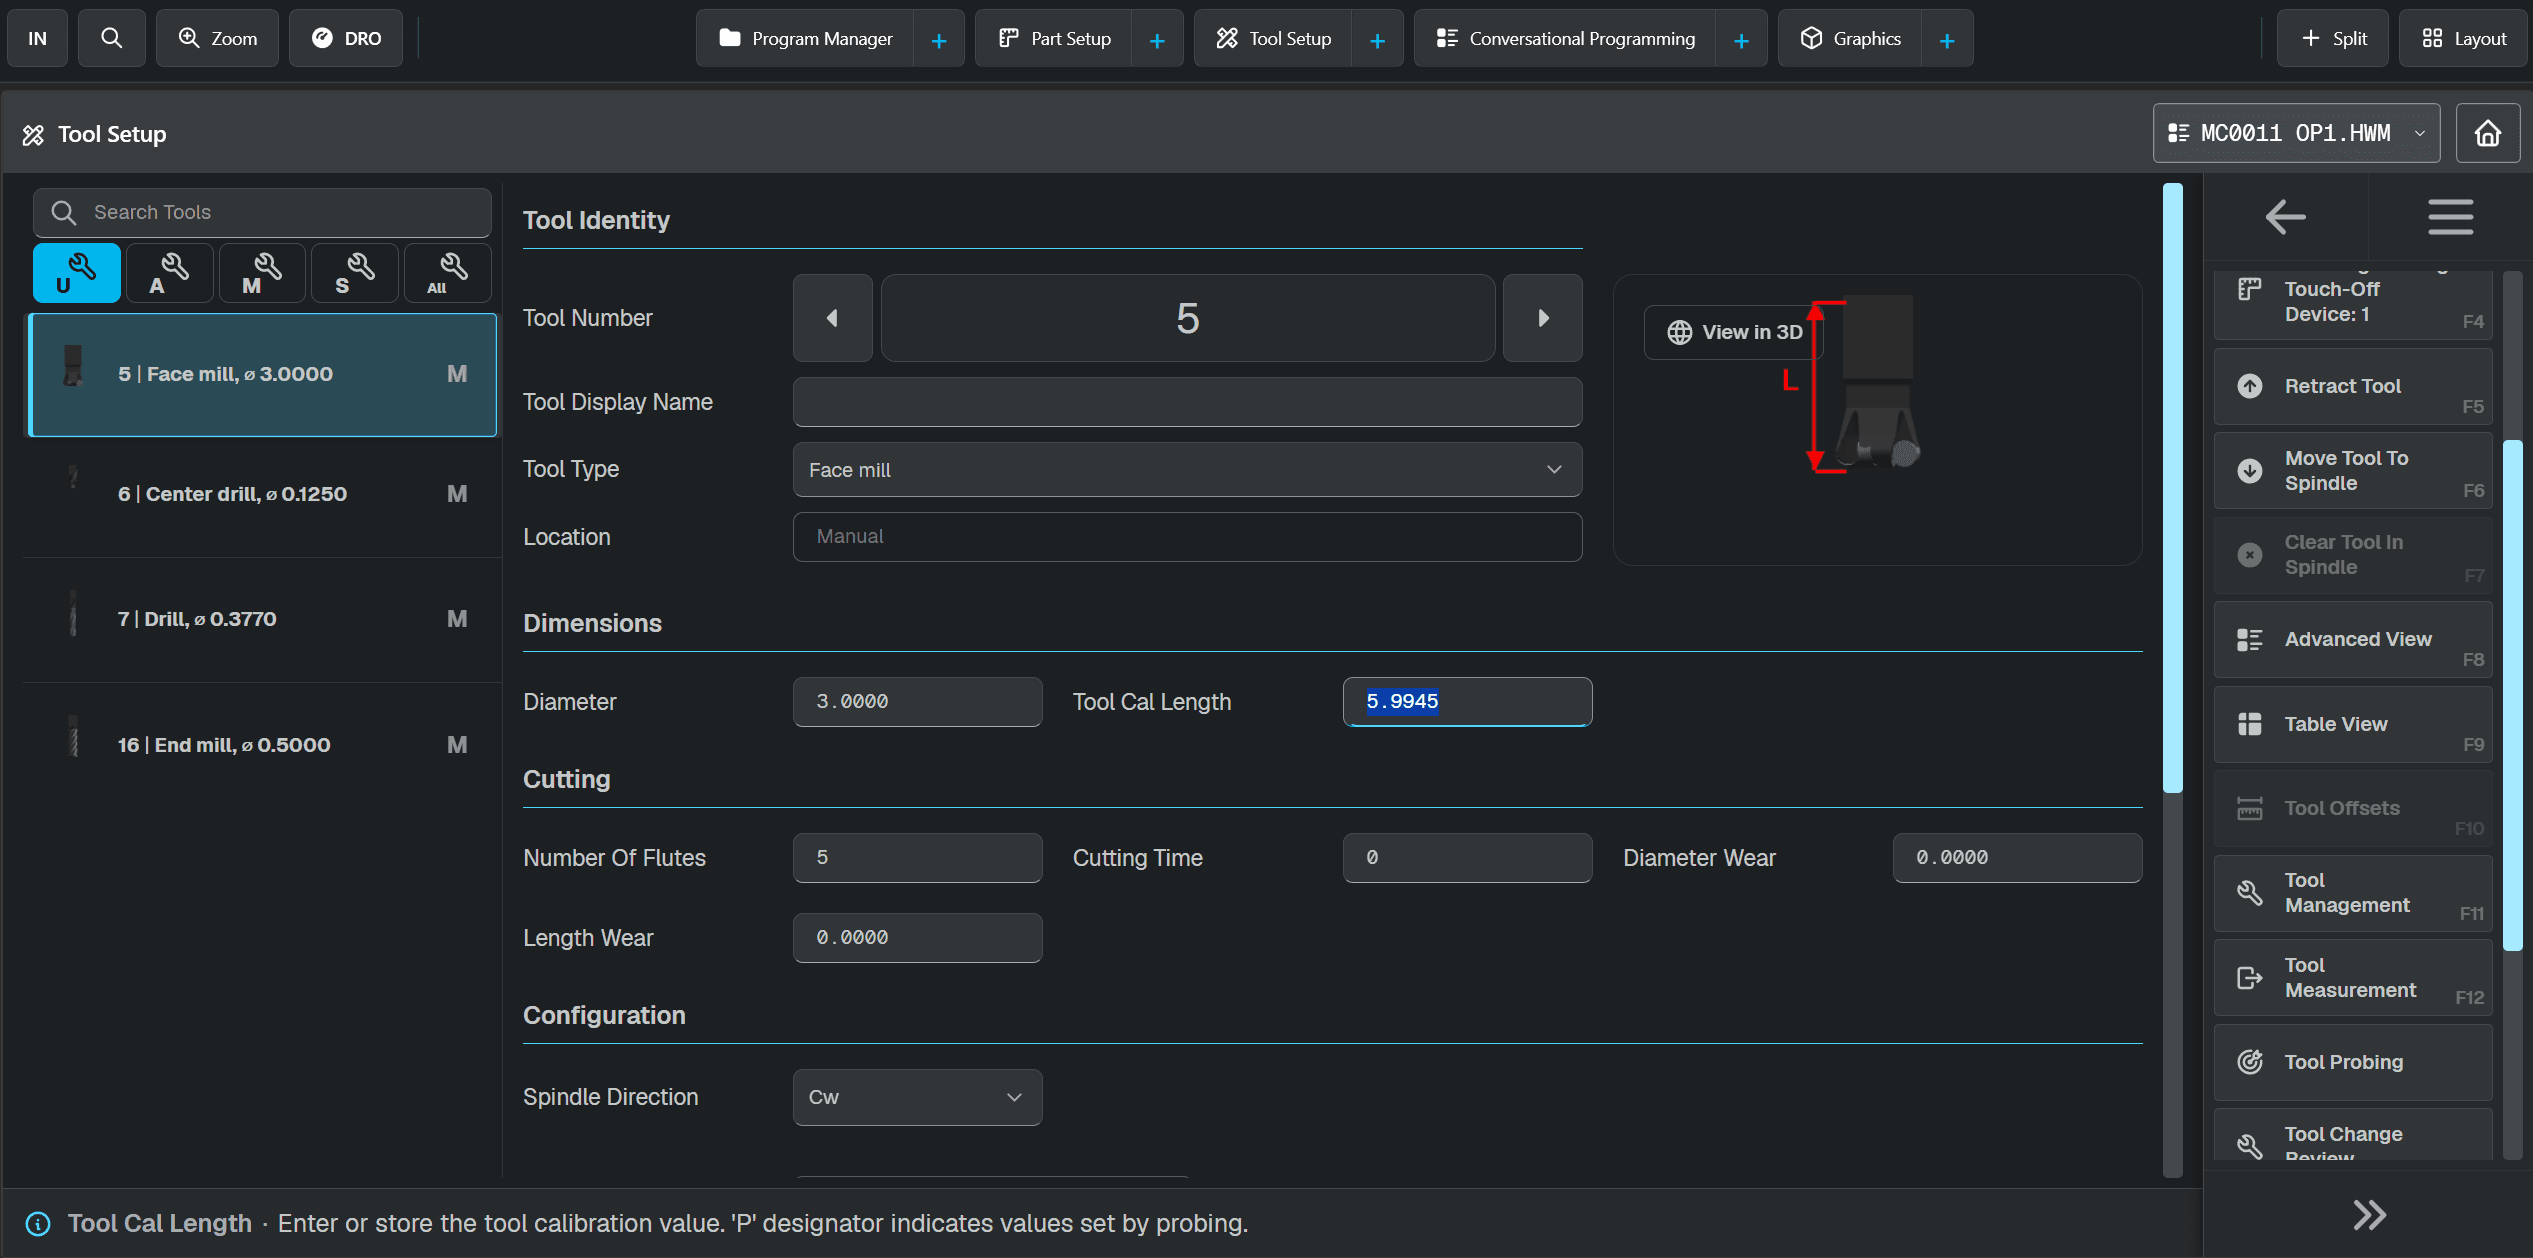
This new navigation style replaced the legacy softkeys that ran down the right side of the screen. That freed up space for new softkeys that give direct access to settings and screens that used to be buried several button presses deep in UltiMax and WinMax. Take a look along the right side of the screenshots in this article and you will spot some of the new ones.
After Input, the Review screen is probably the screen WinMax users spend the most time on. It is still here with a new look and a new name: Conversational Programming.
All the data blocks are still listed like the table of contents of a book. The difference is that groups of sub-blocks are now collapsed behind a small arrow, so longer programs are easier to scan. You can expand or collapse everything with a single softkey.
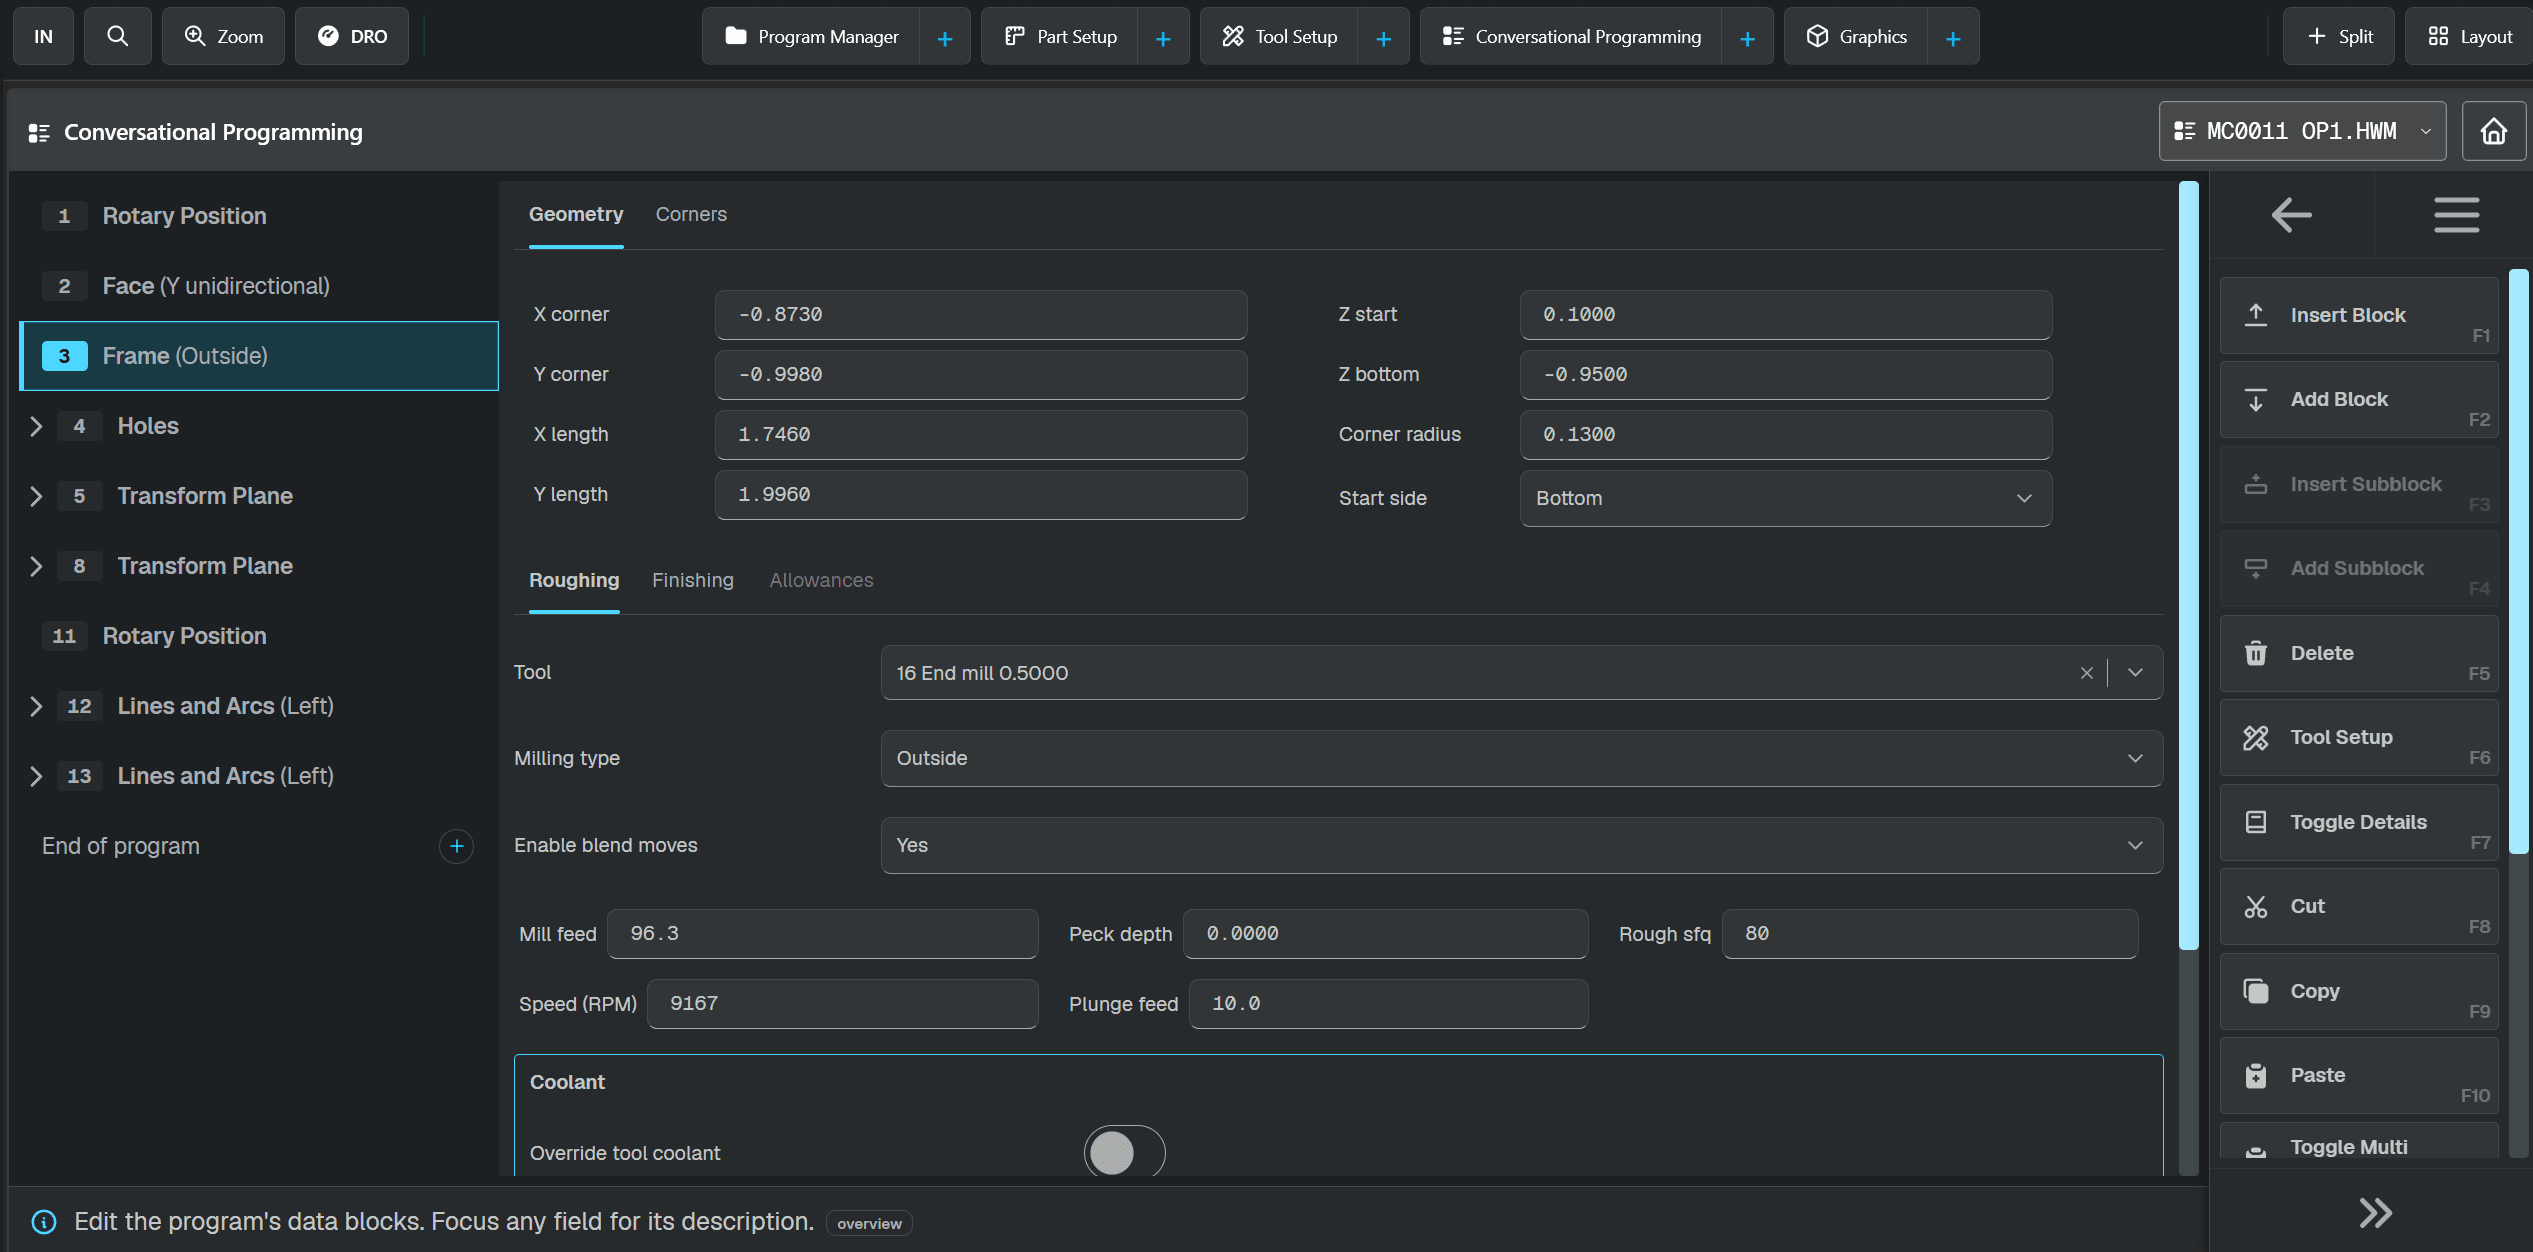
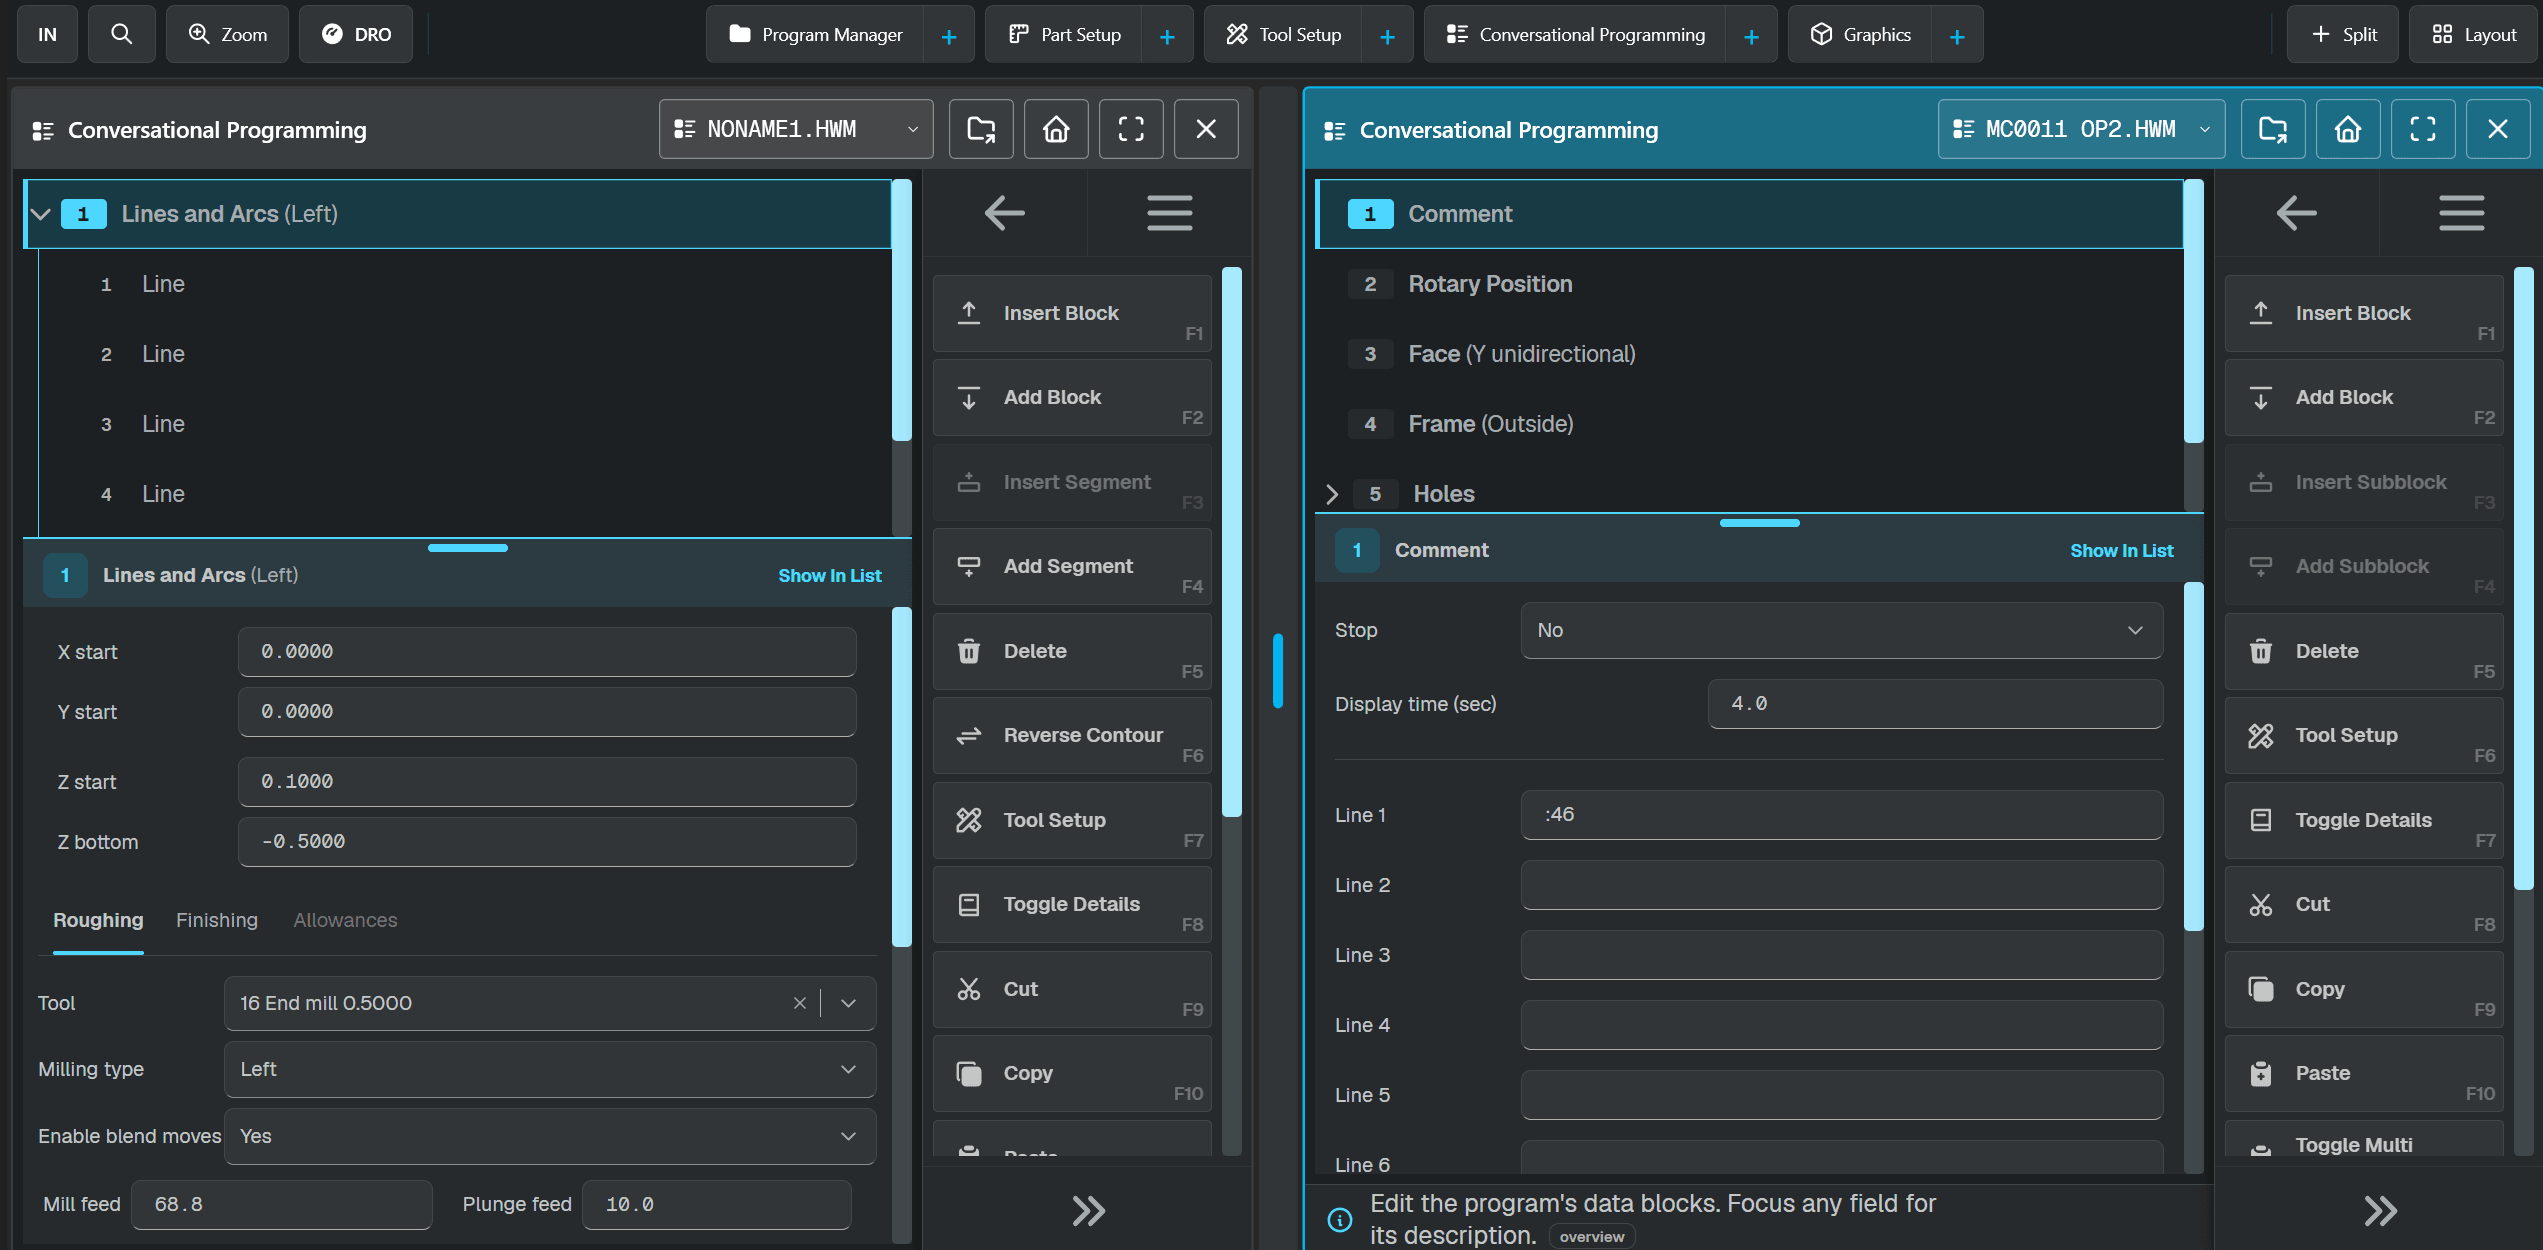
A feature I find very useful is the pull-down menu in the top right corner of every screen that lets you choose which program that screen is working with. This is especially helpful when copying data blocks between two different programs. Open two Conversational Programming screens, point each one at a different program, and copy and paste between them.
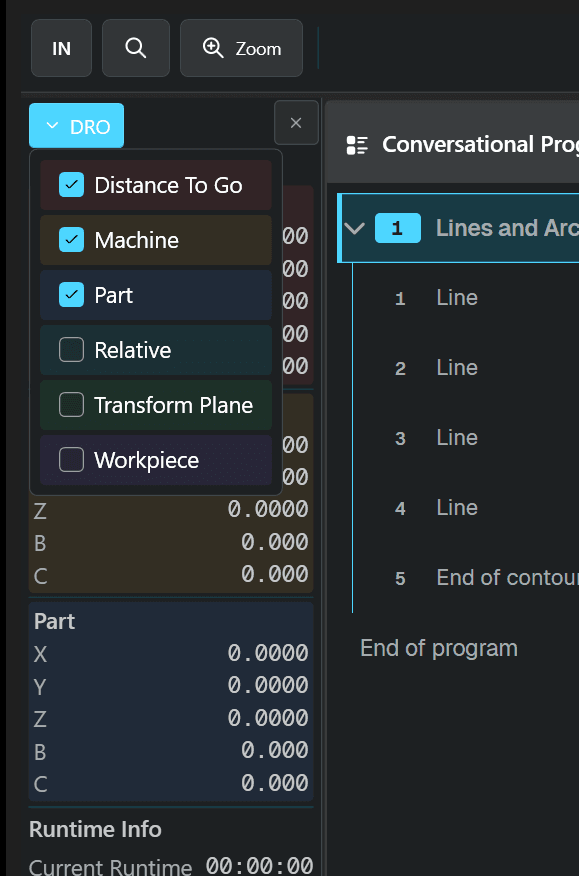
Another welcome change is control over the DRO. Press the DRO icon in the top left corner of any screen to open it, and press the X to close it when you are done. The DRO menu also lets you choose exactly what information it displays.
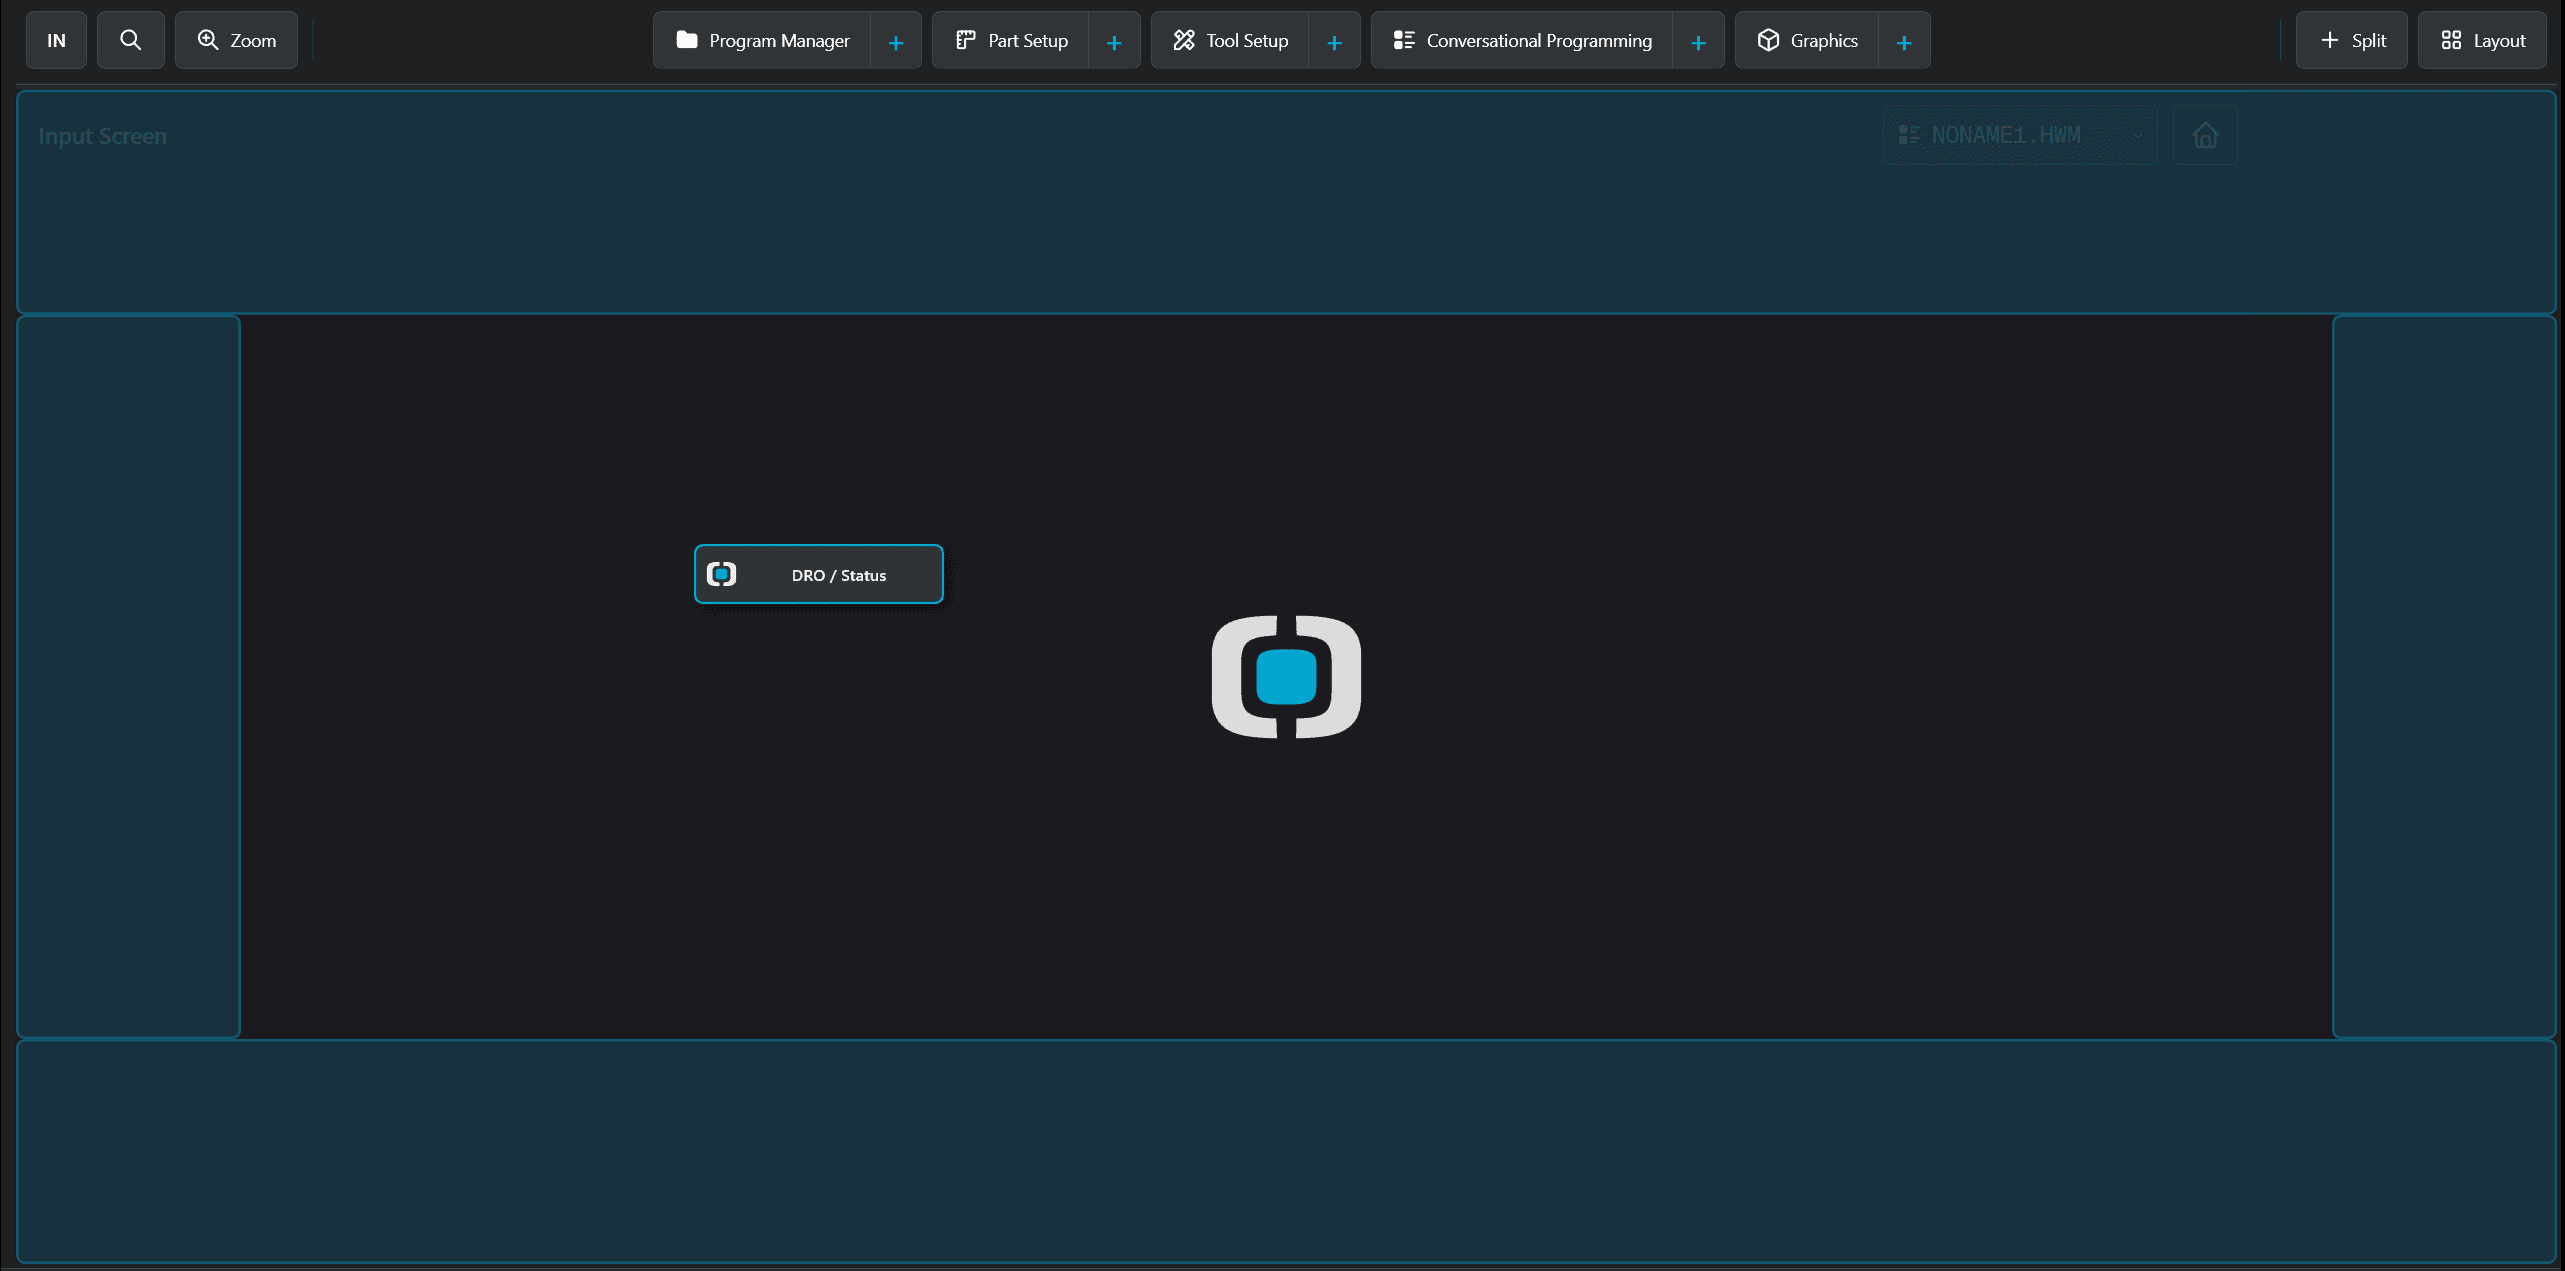
You can also drag the DRO to one of four positions around the screen: left, top, right, or bottom. Drag it with your finger, release, and it docks in place.
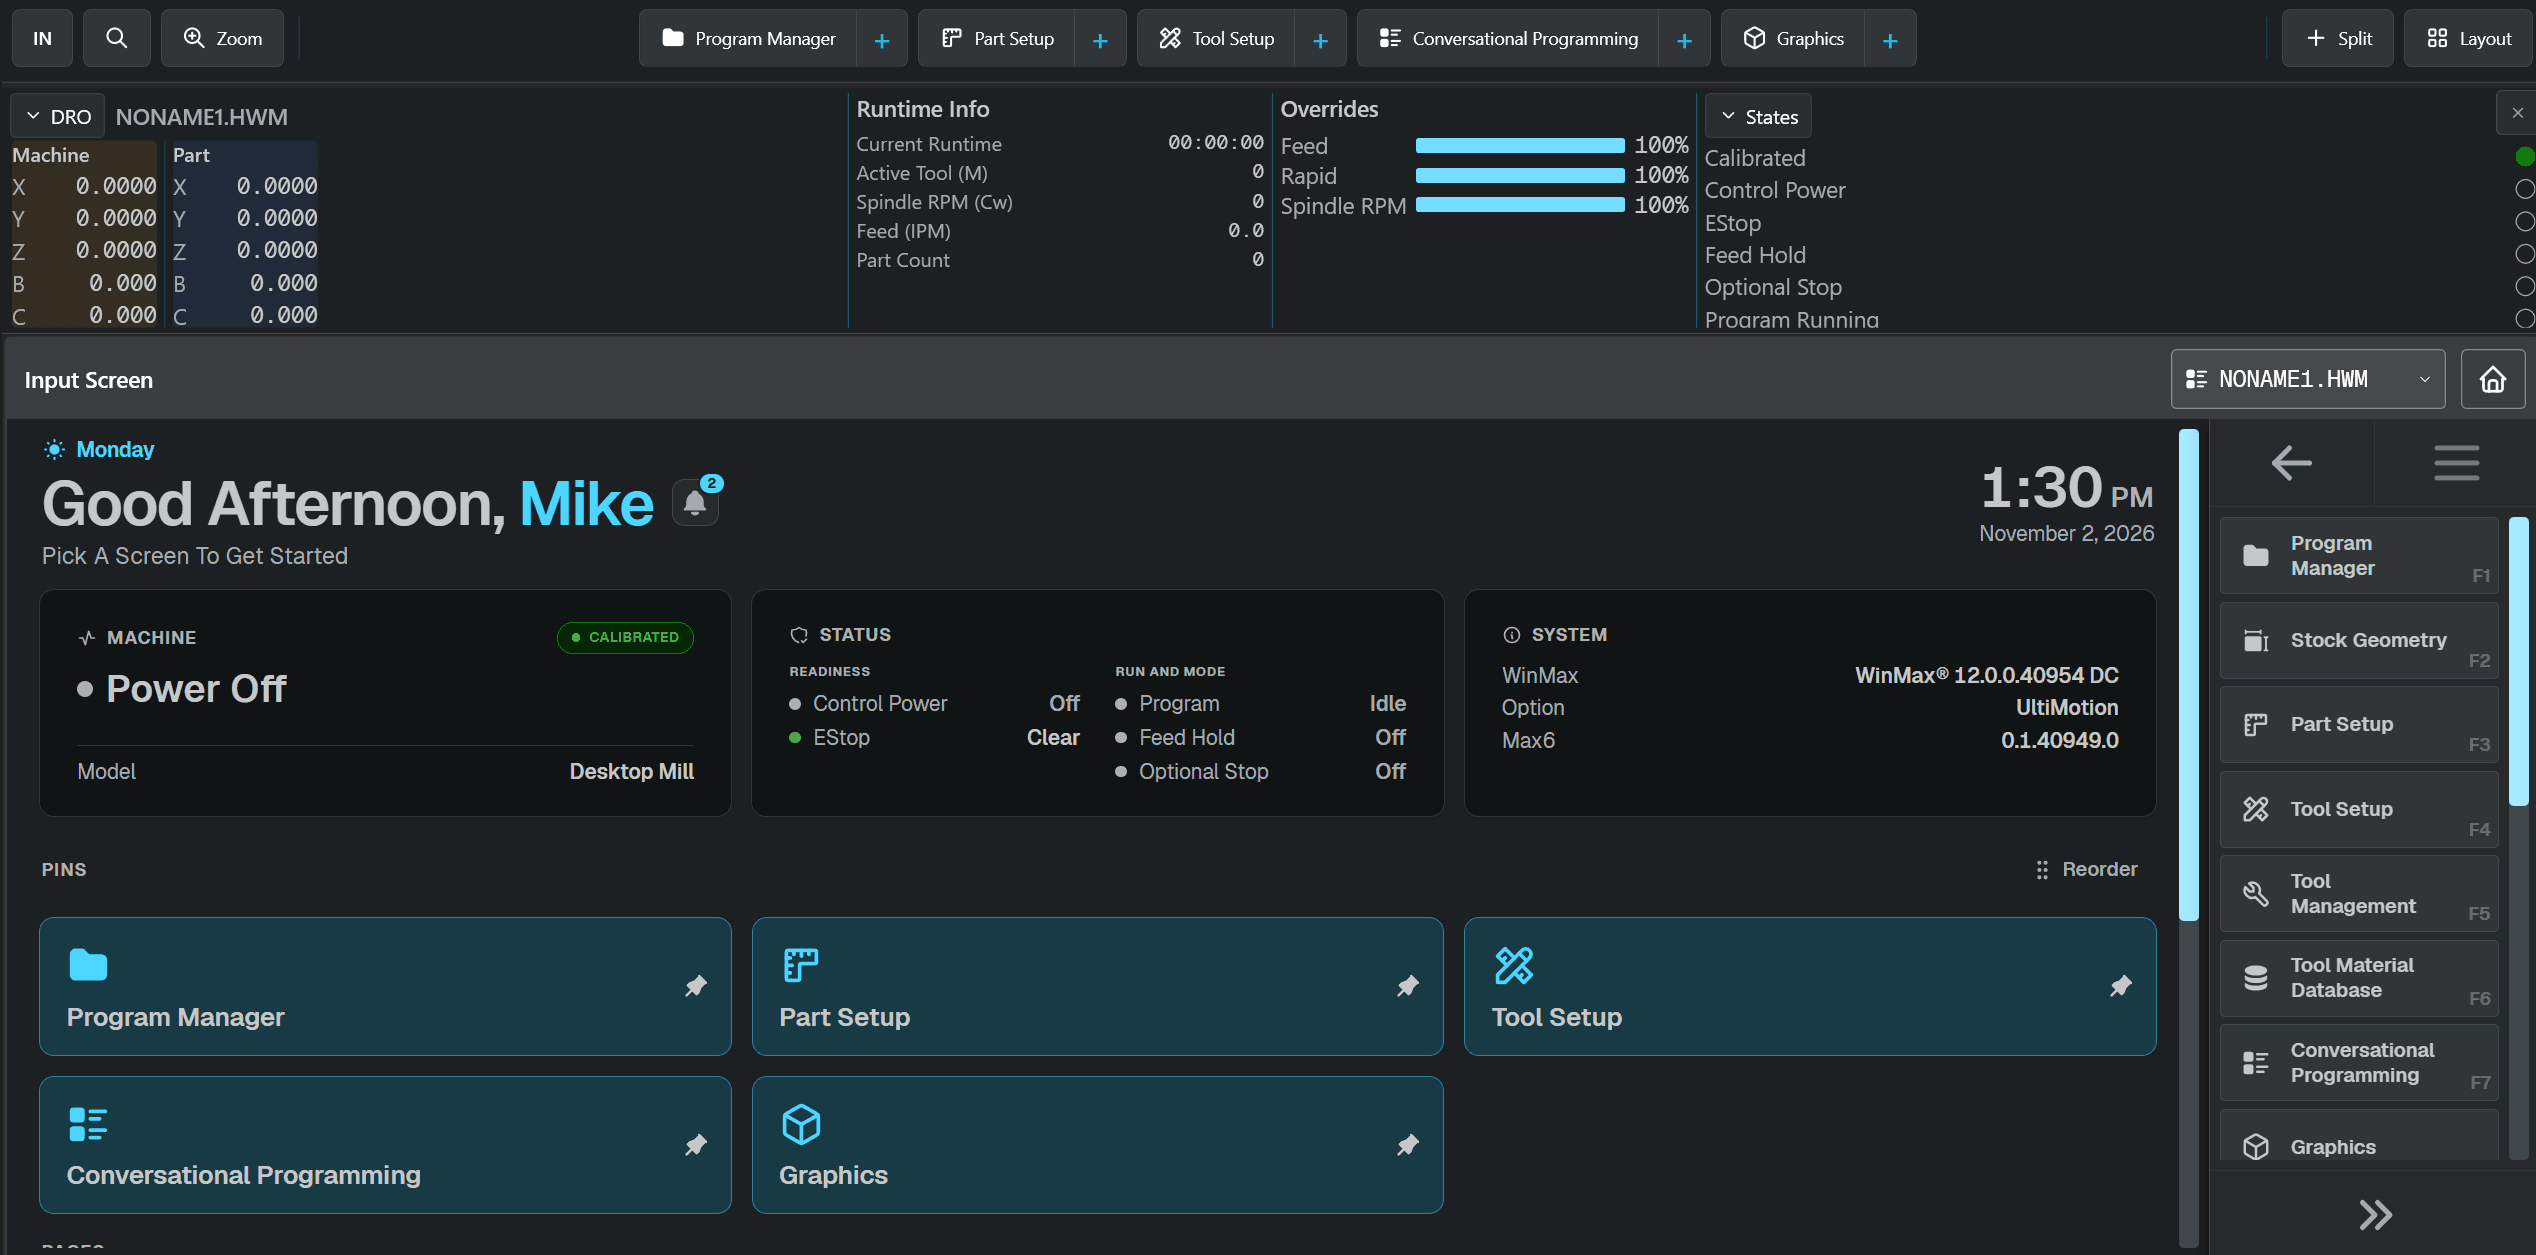
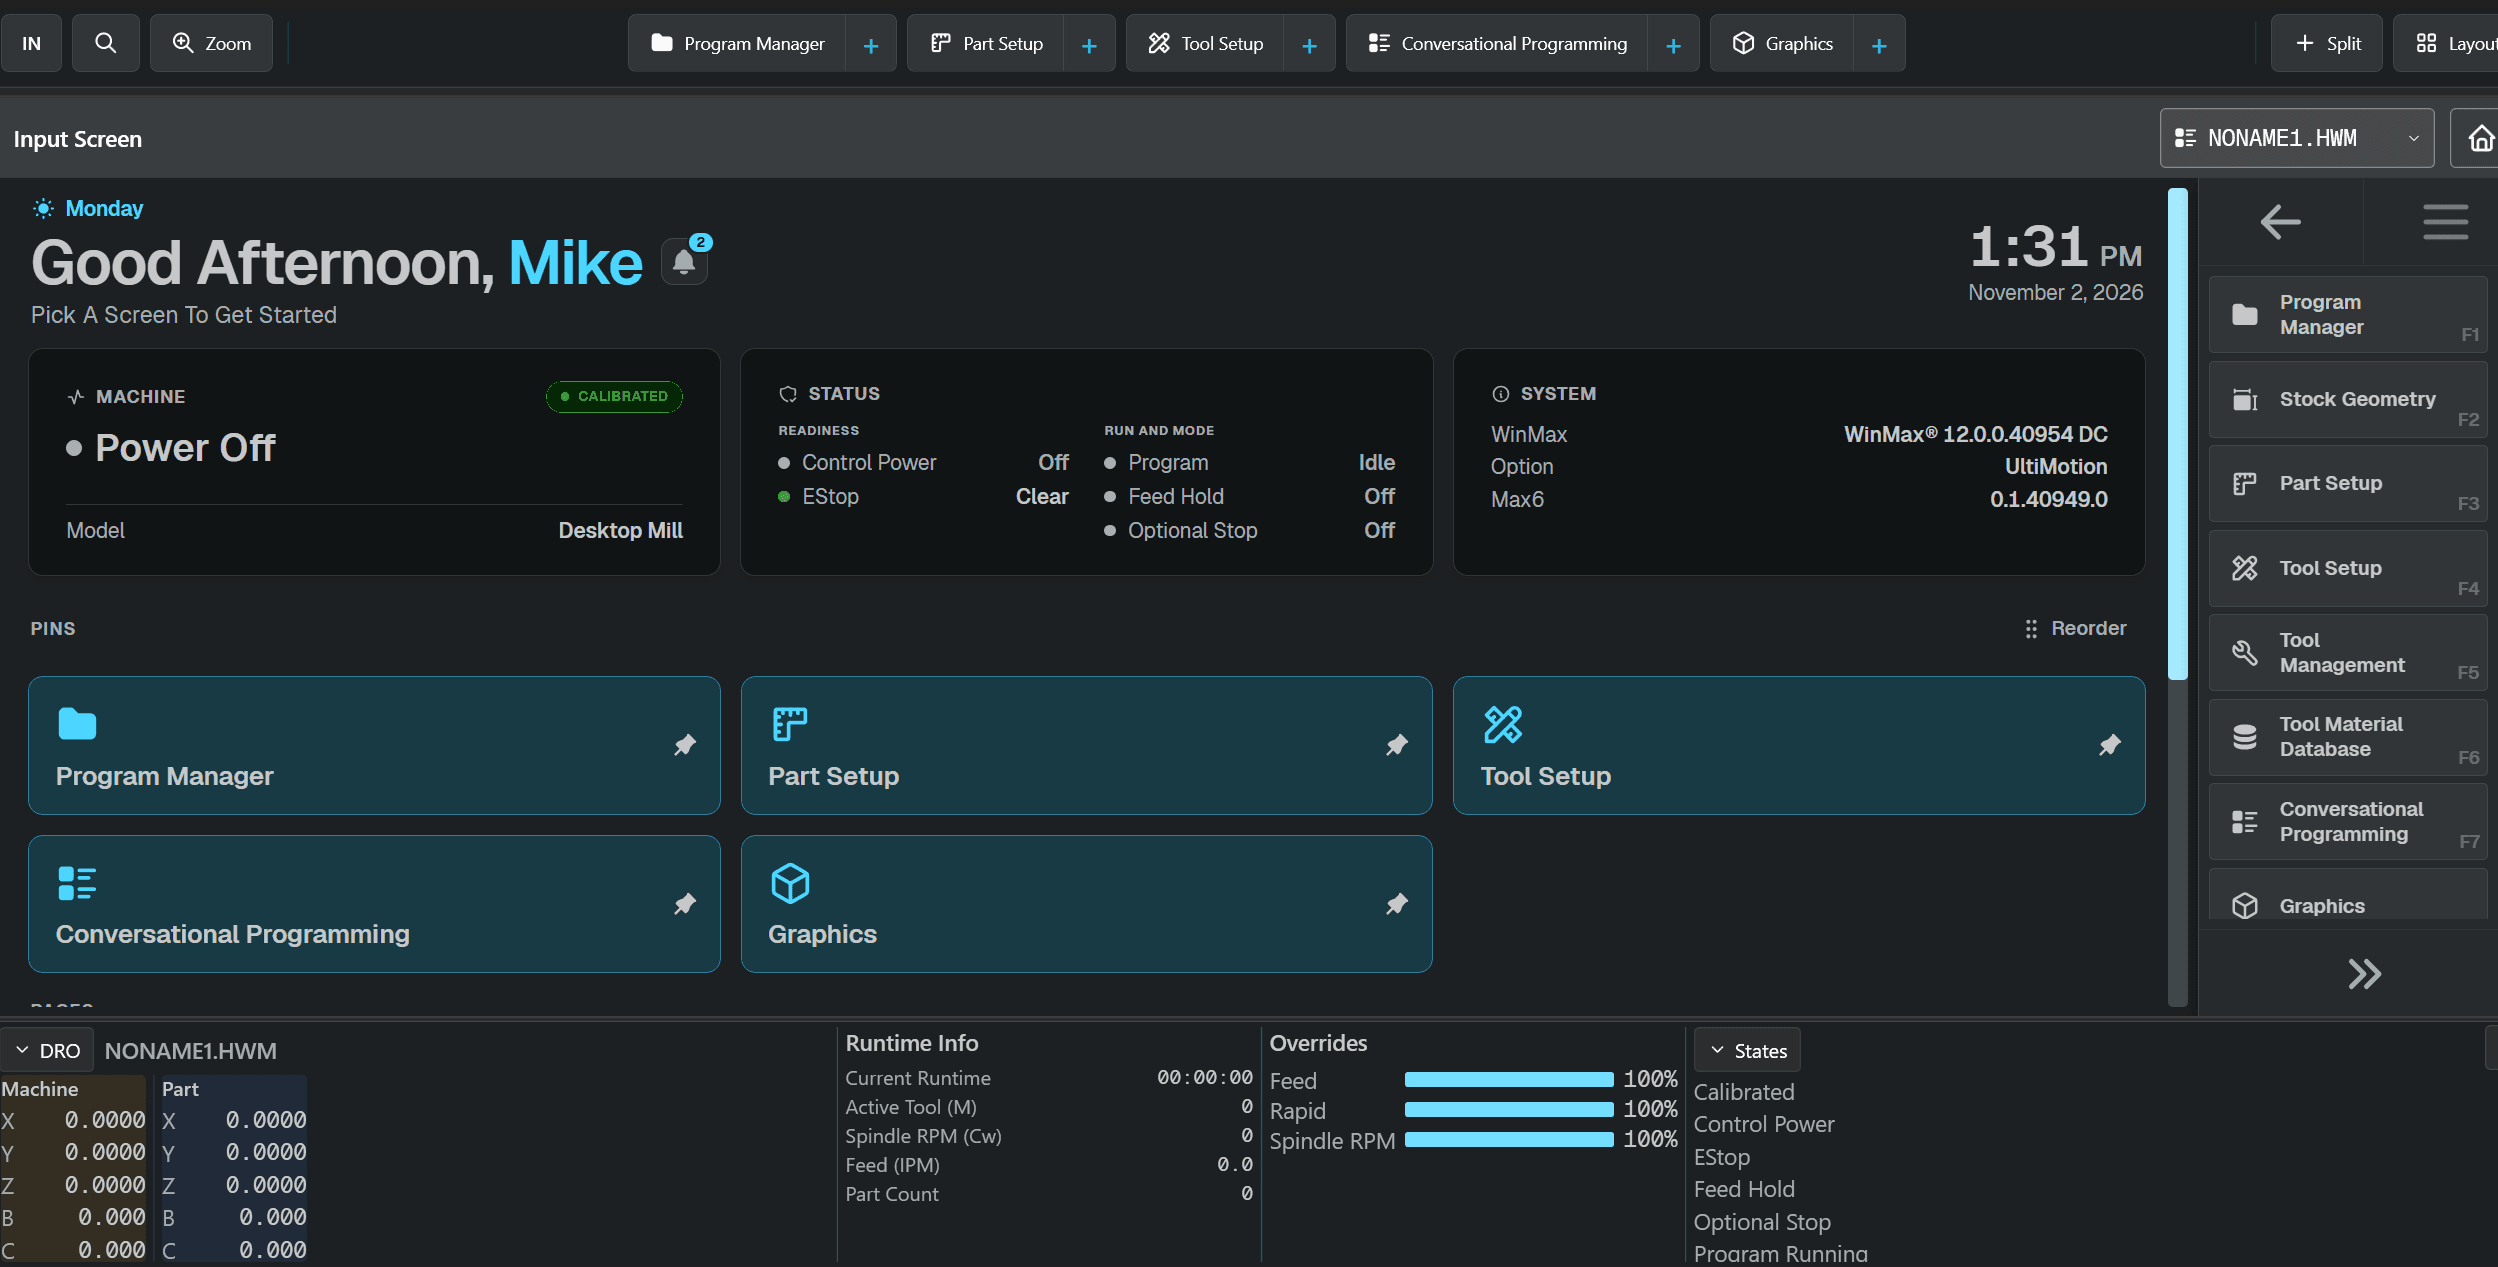
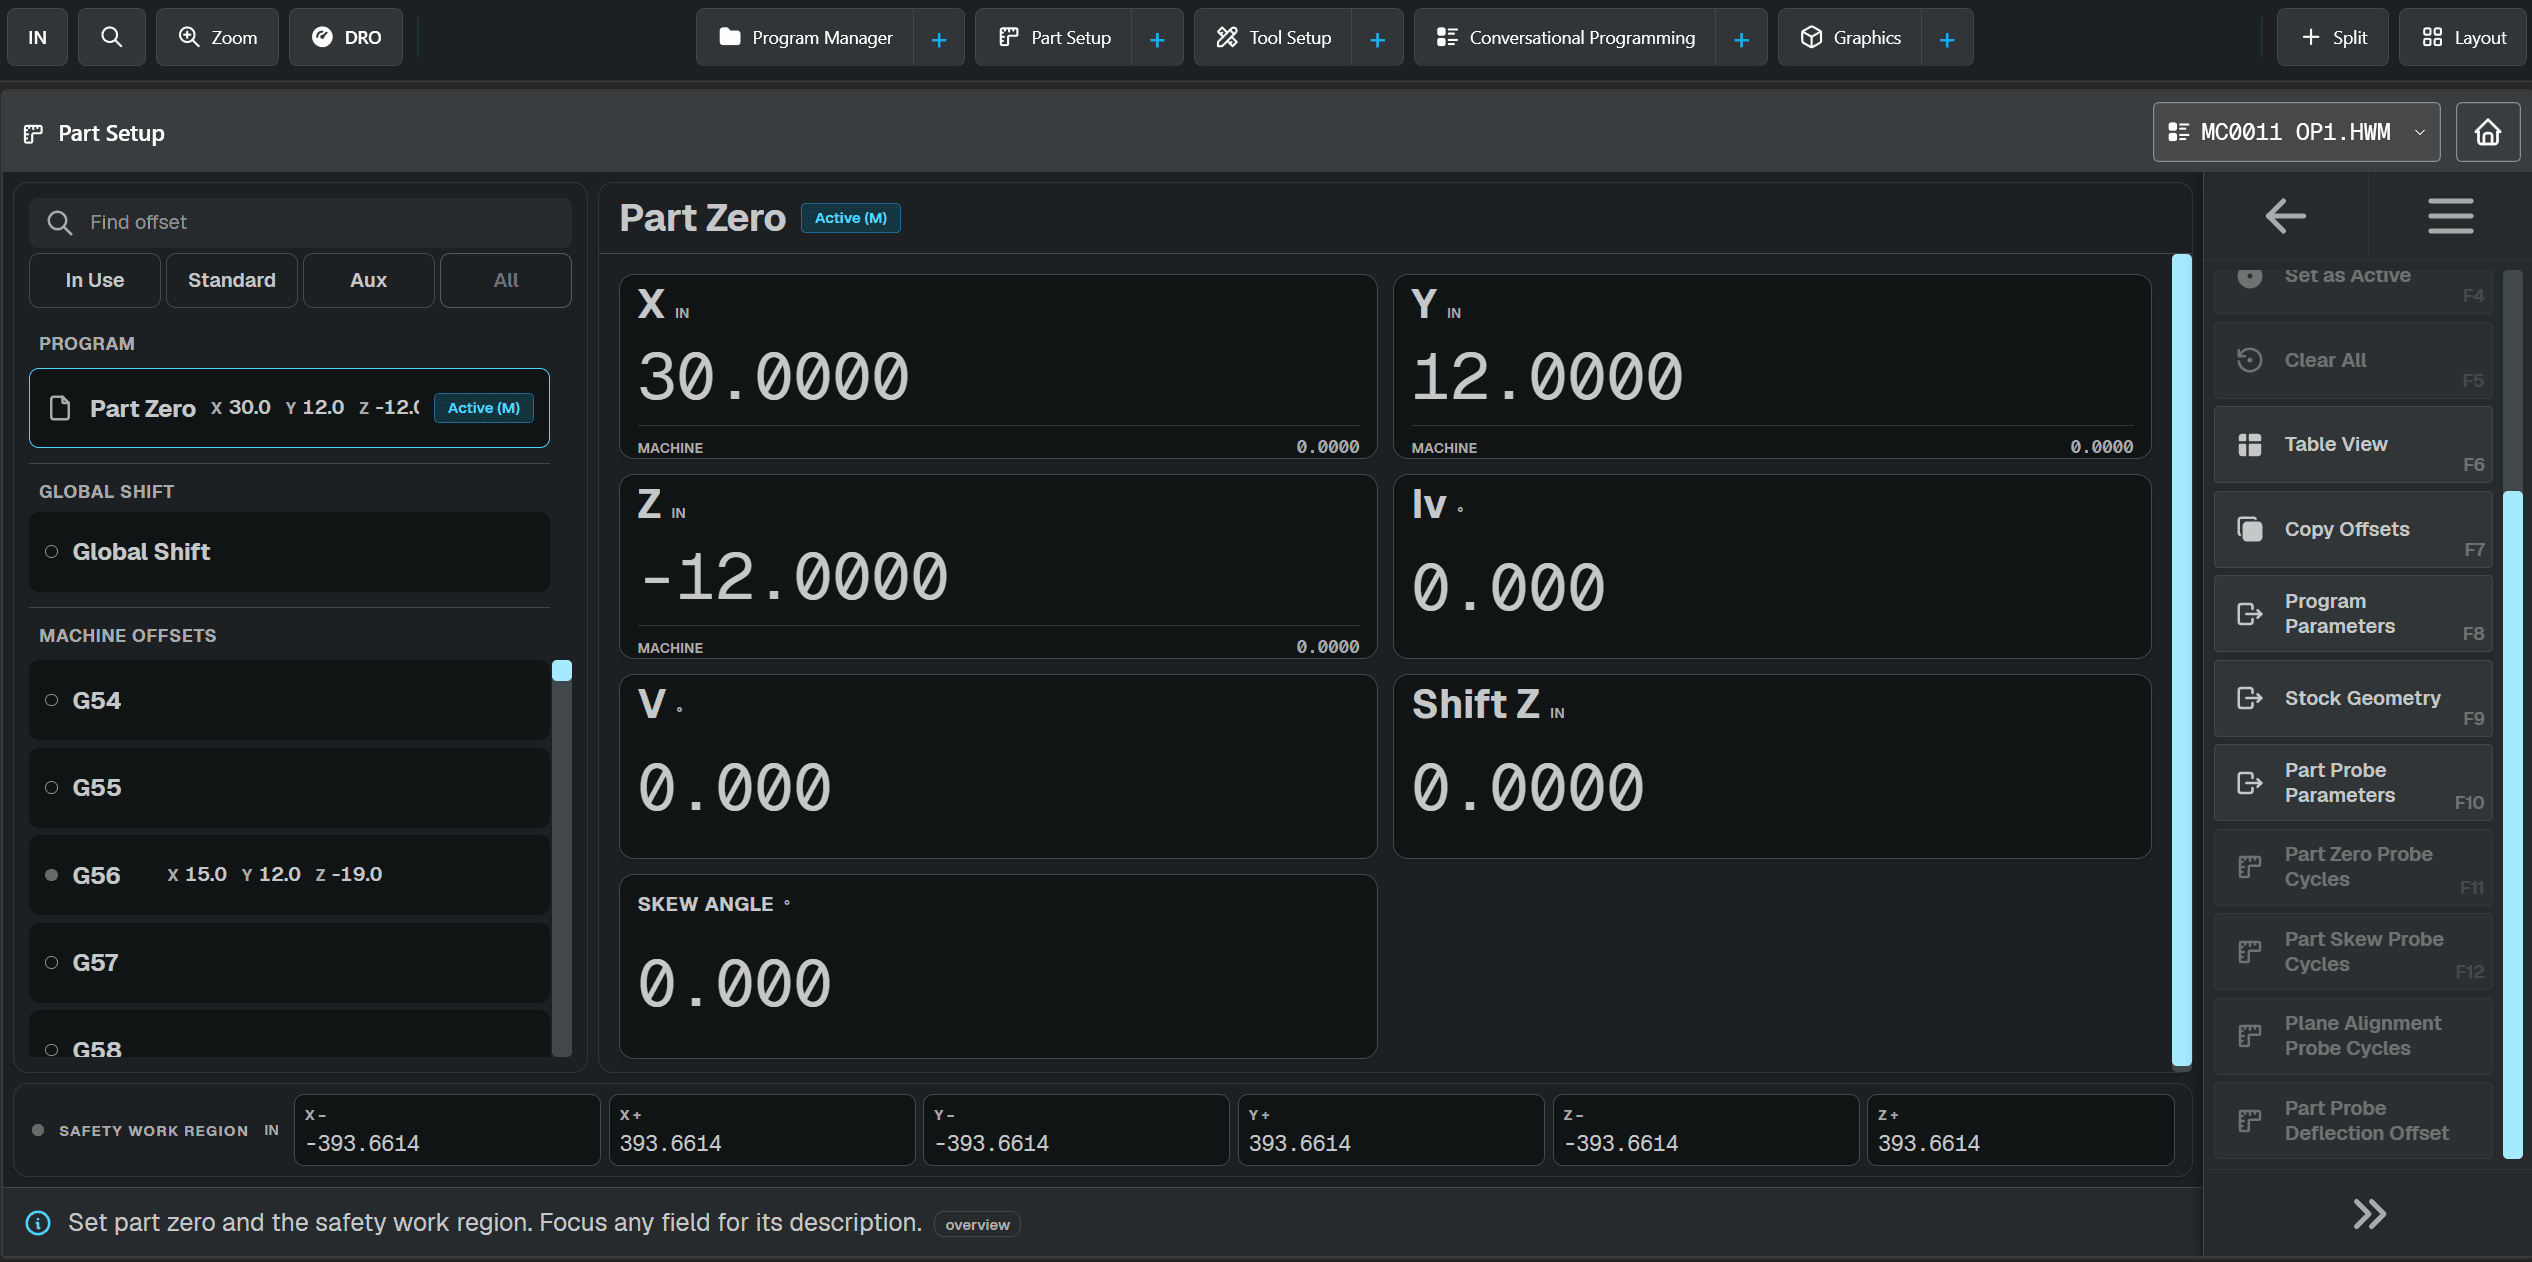
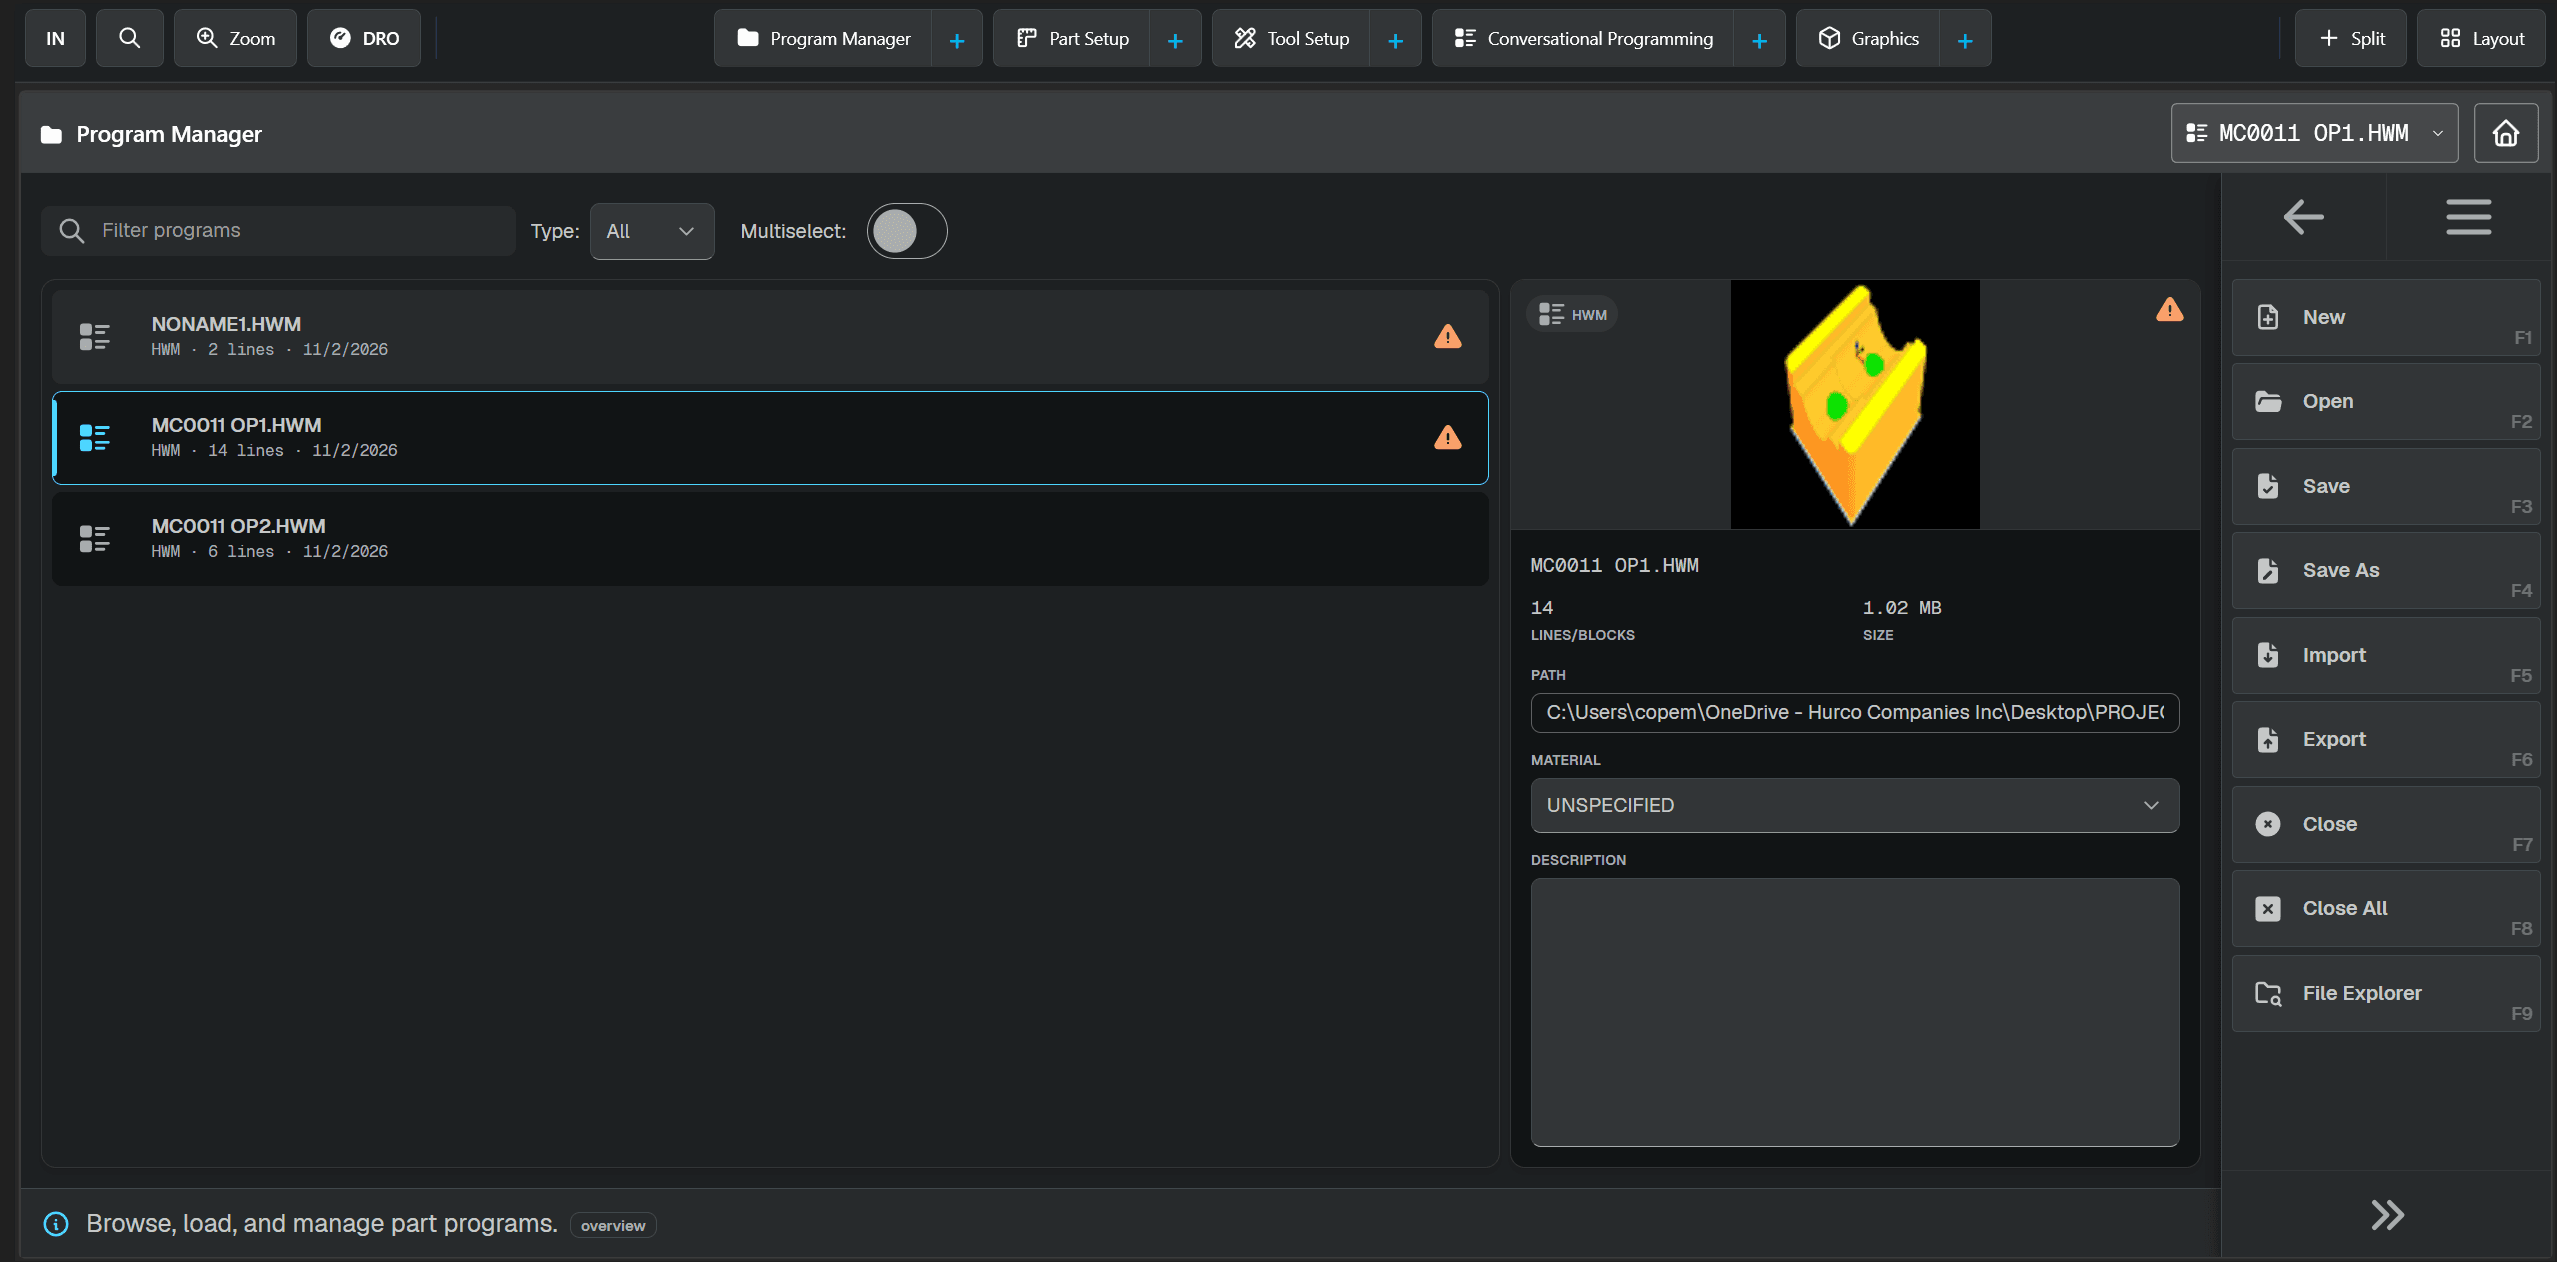
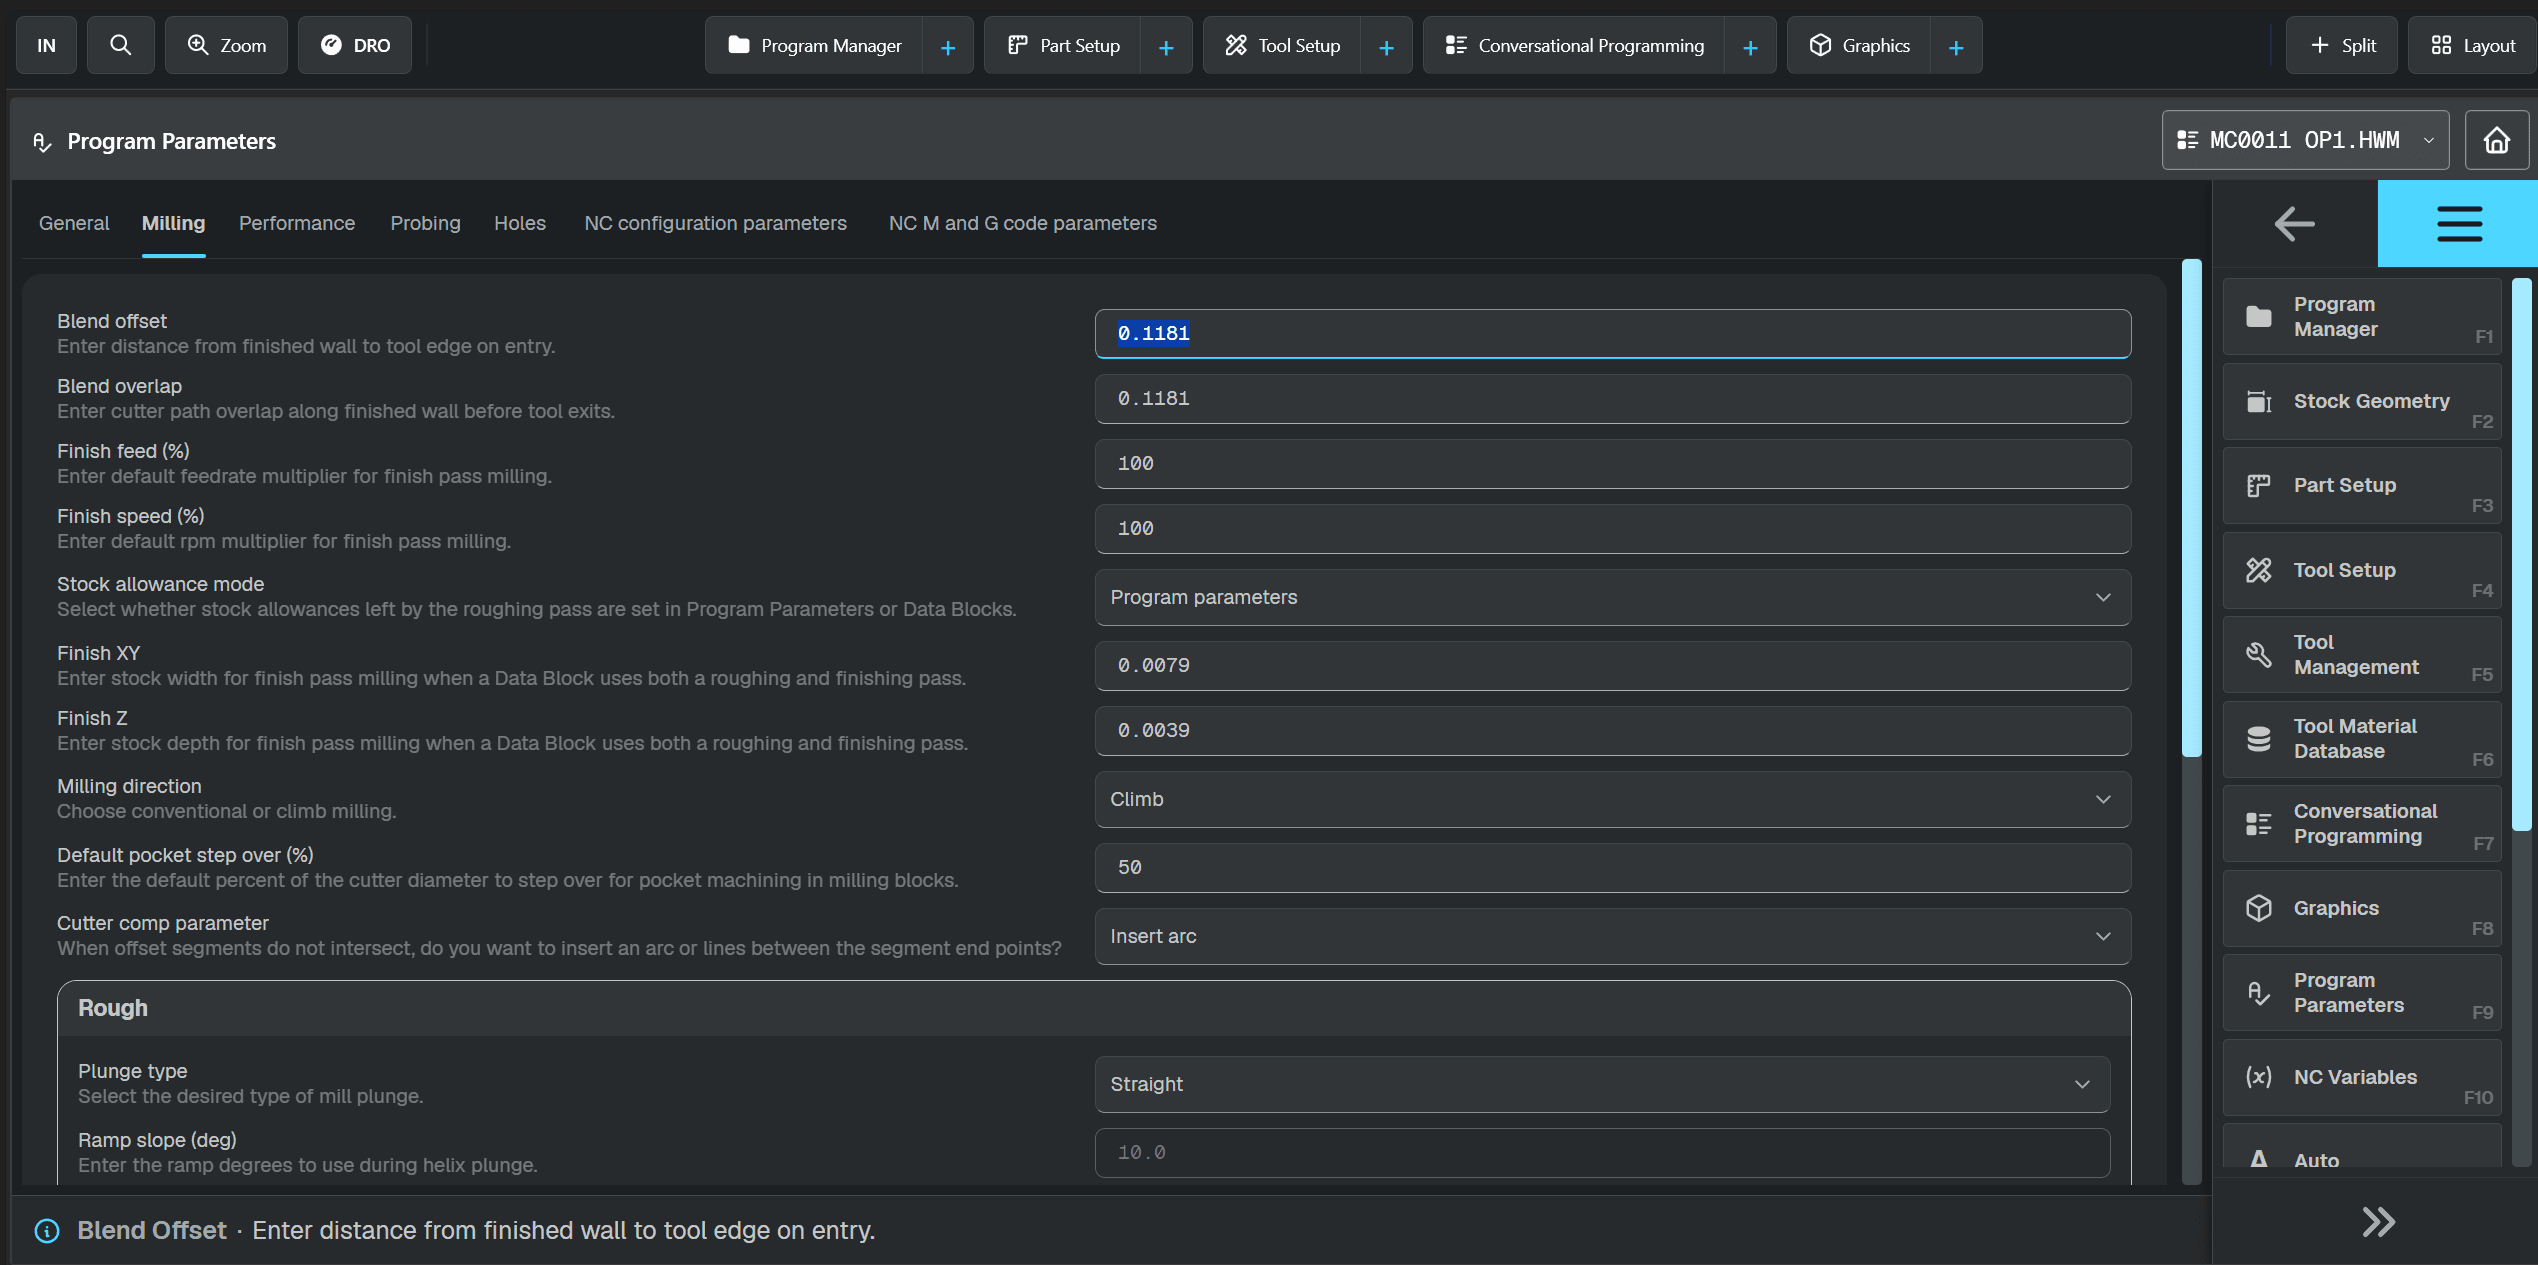
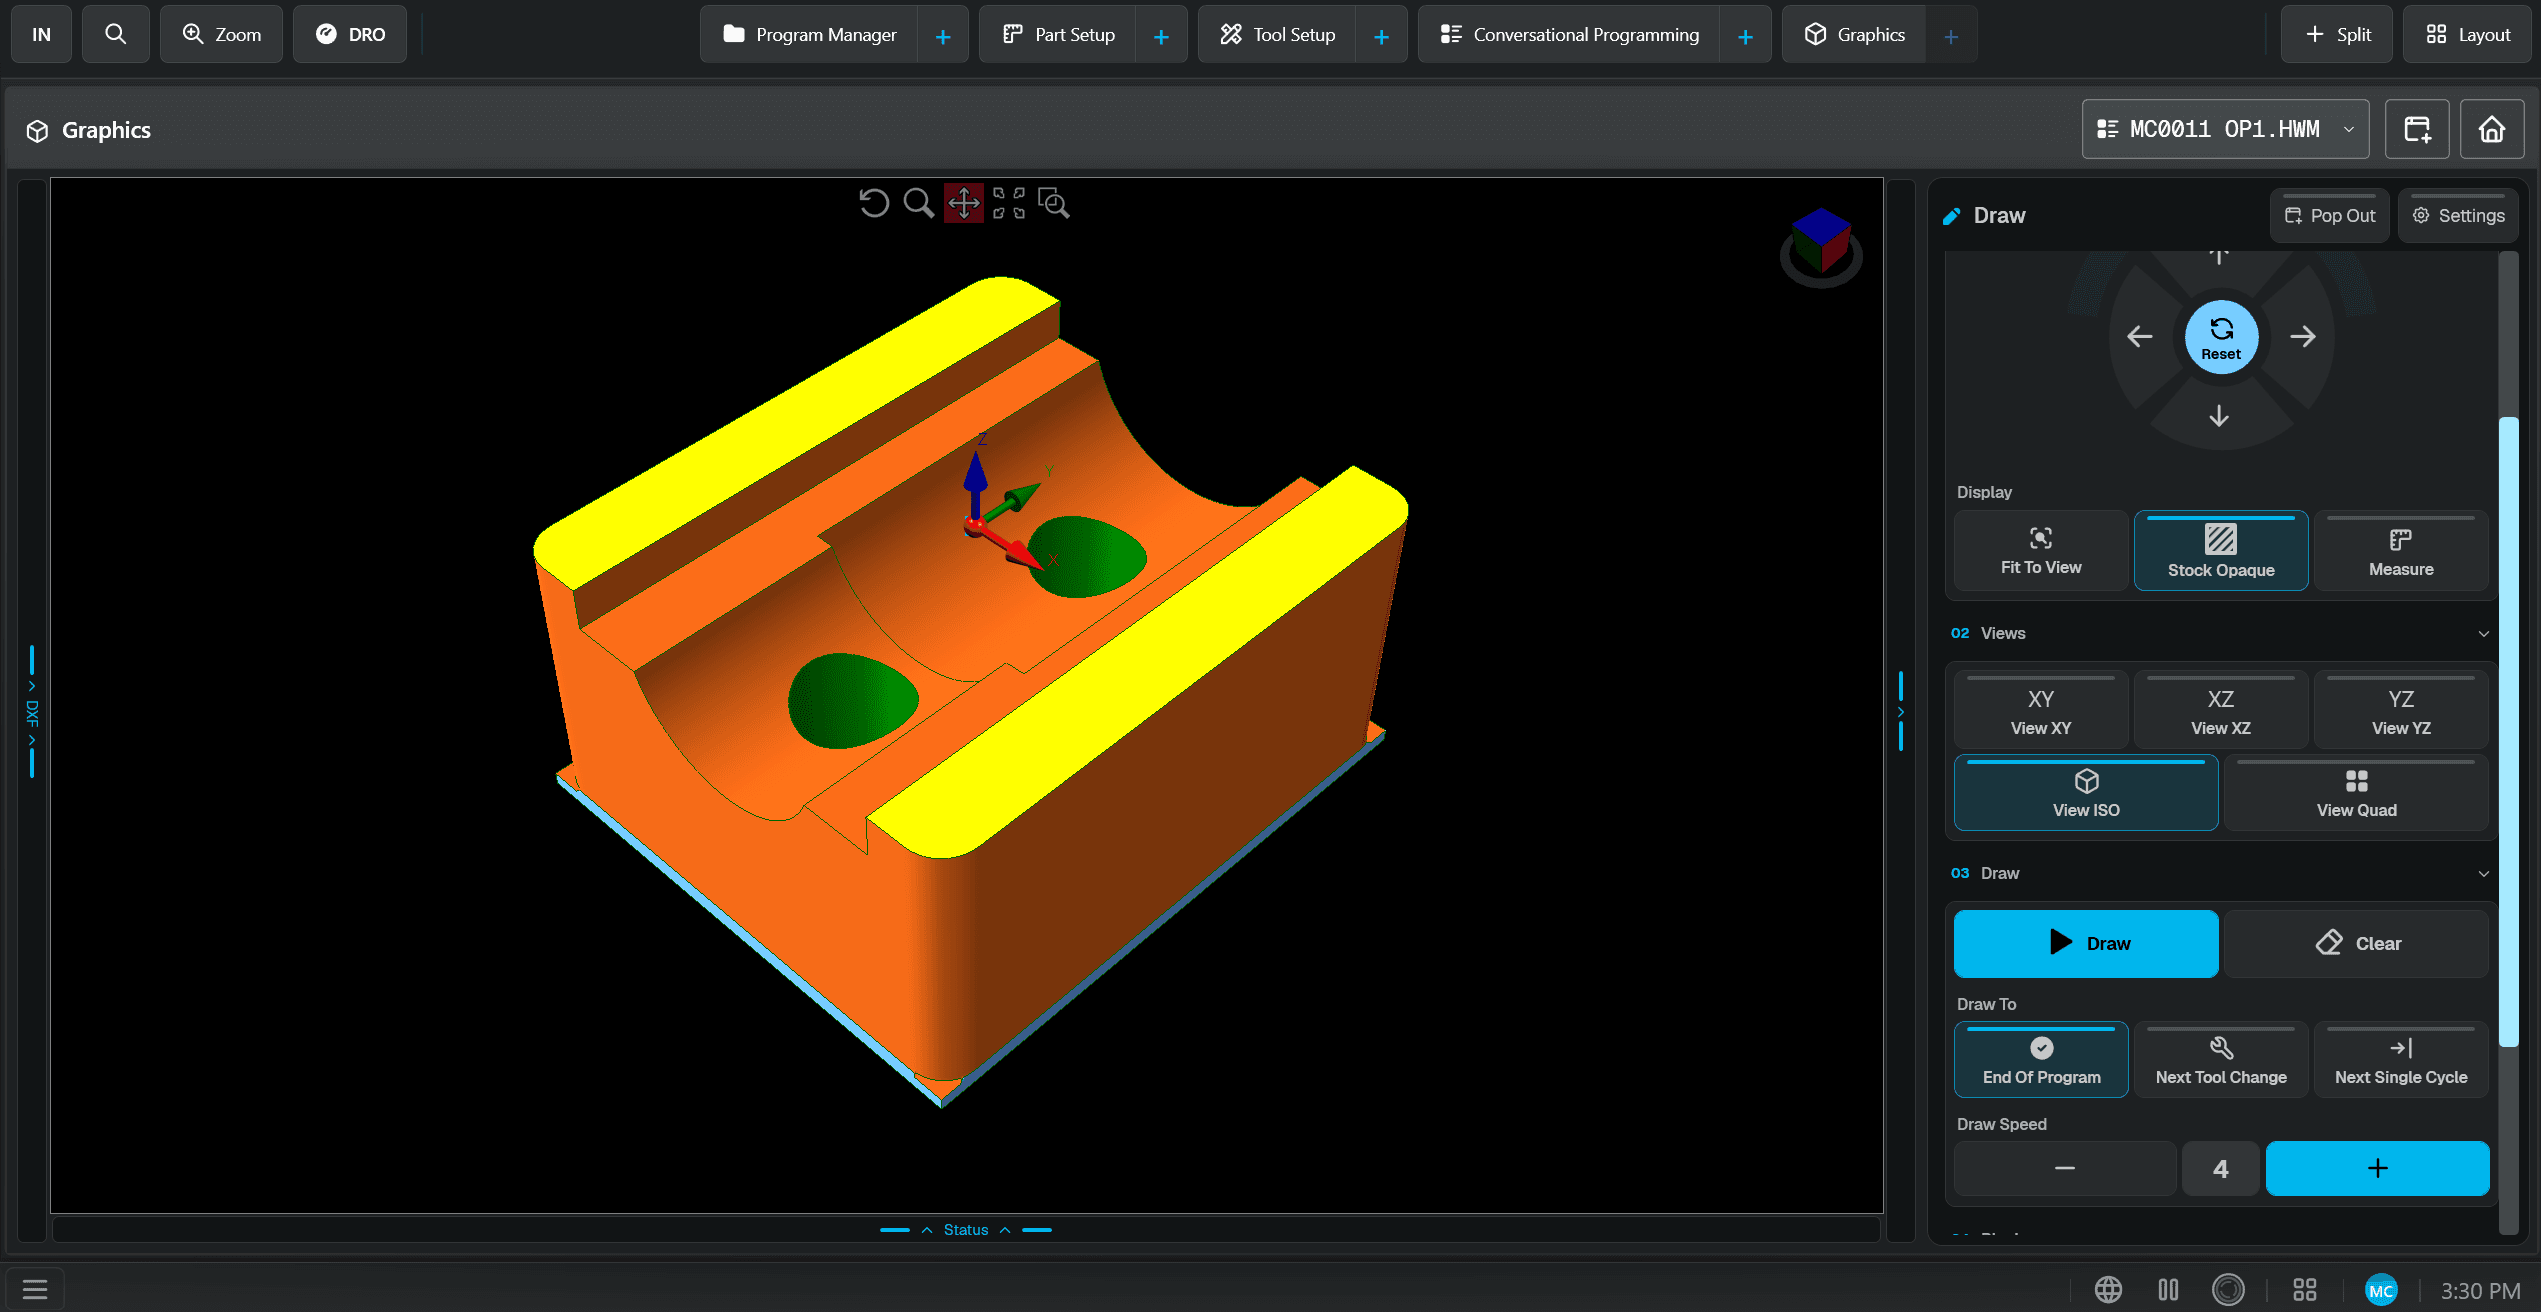
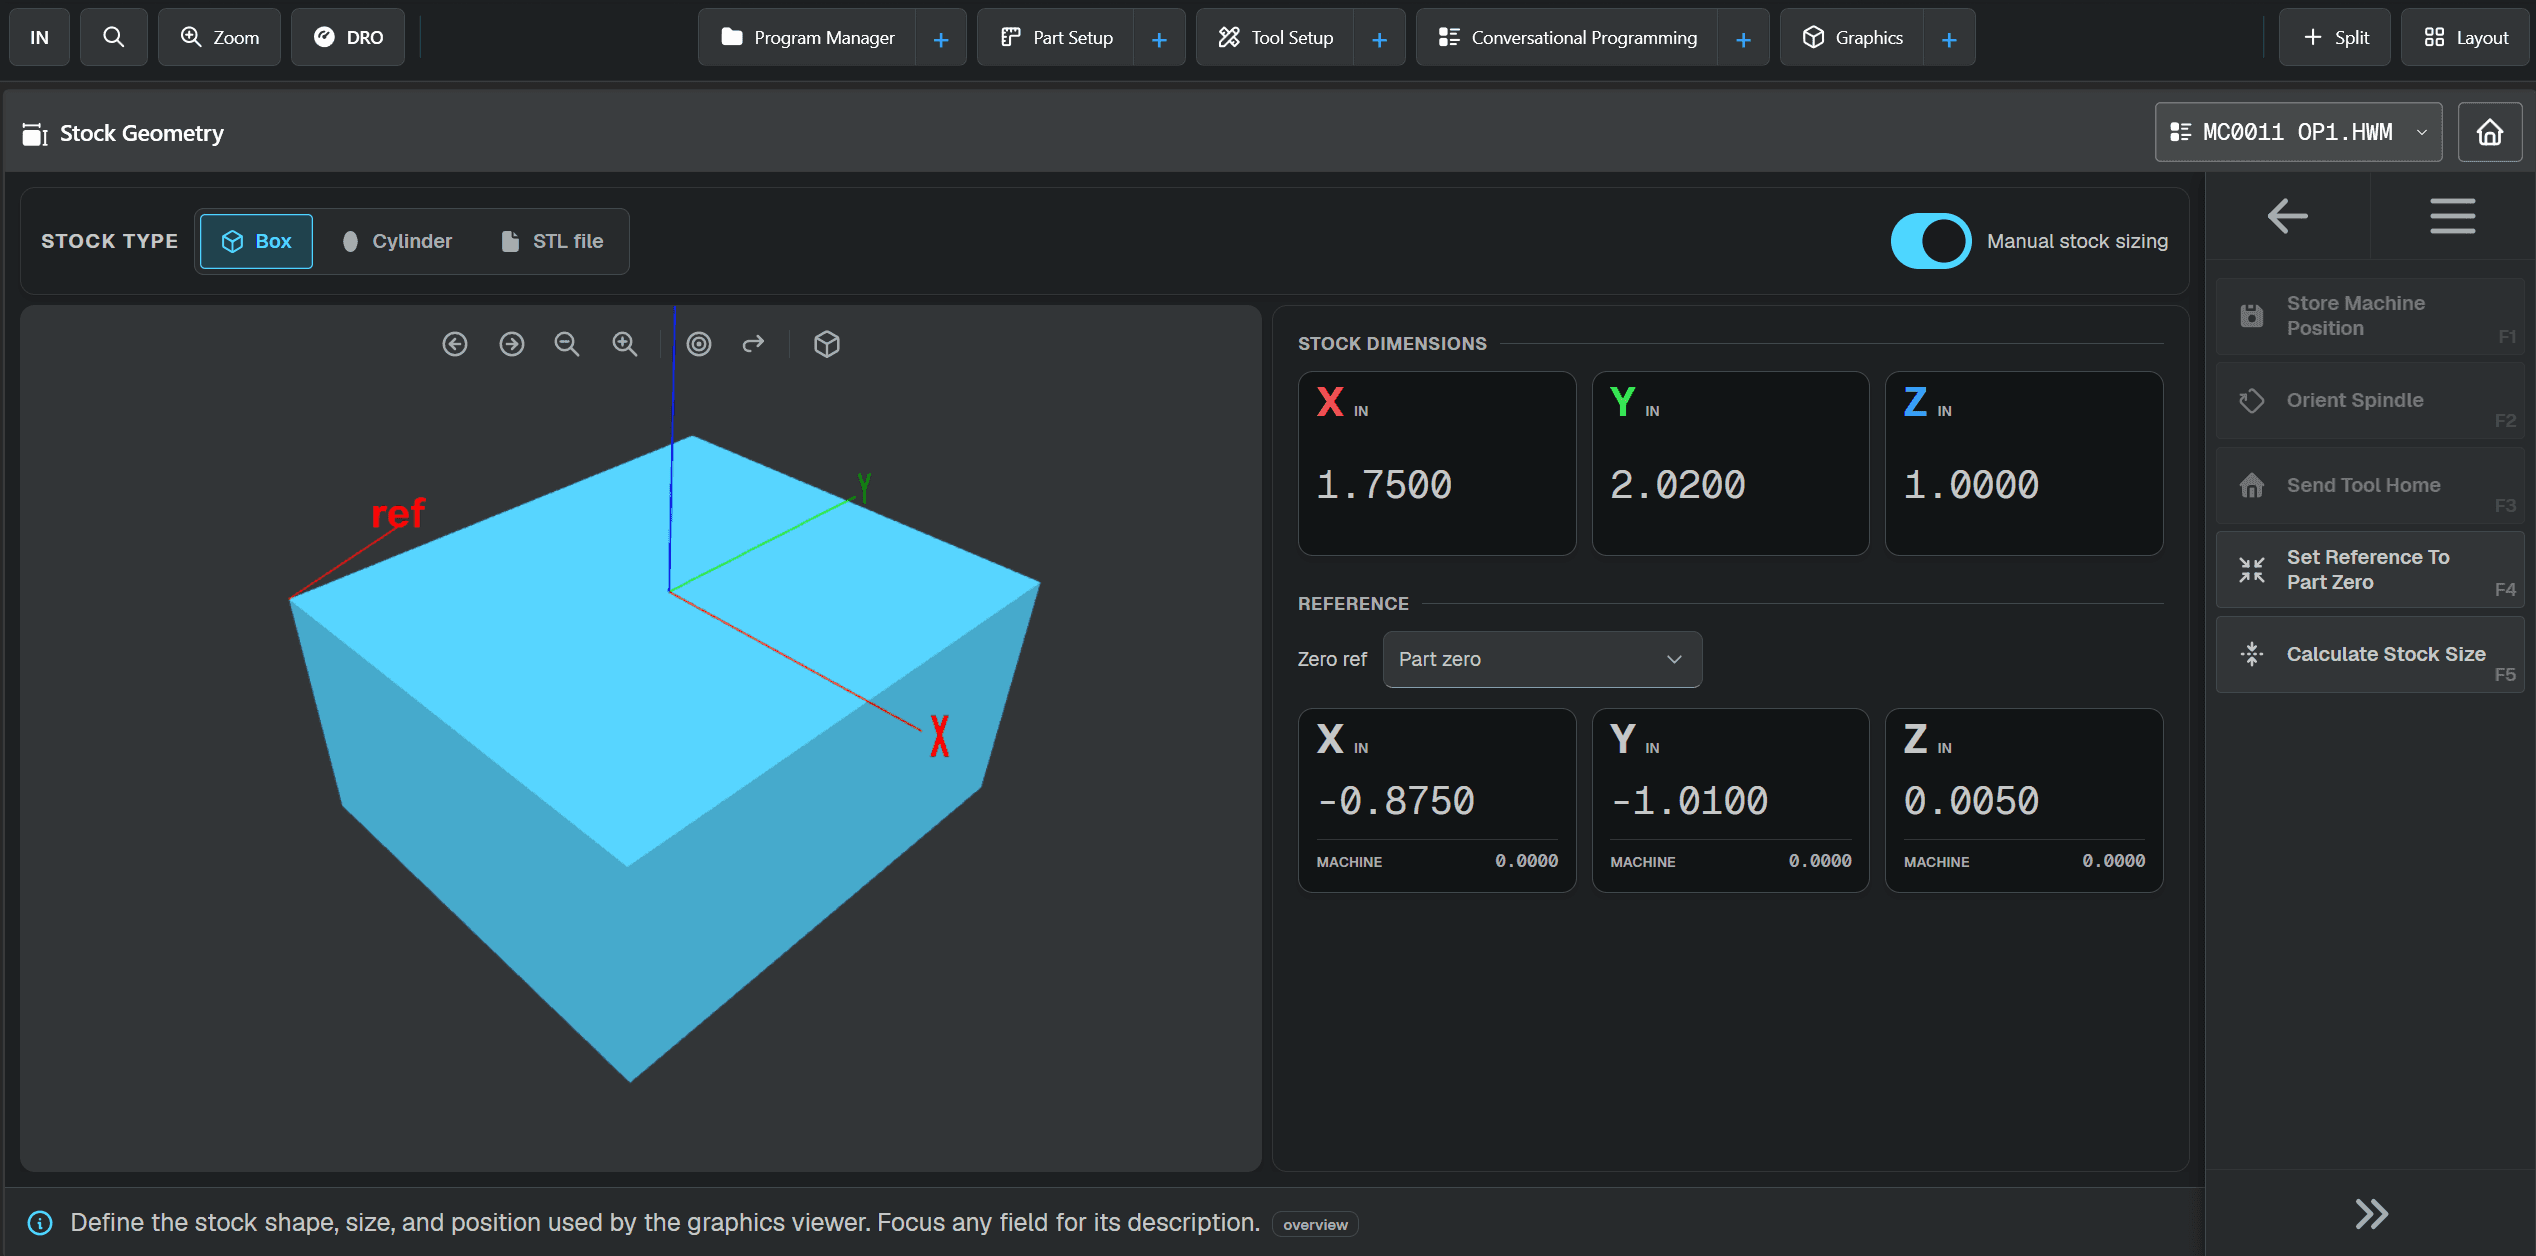
Here are the other screens you use every day: Tool Setup, Part Setup, Program Manager, Program Parameters, Graphics, and Stock Geometry. Stock Geometry is a good example of something that used to take several button presses to reach and is now right up front.
Many of us in this industry hate change. I know I do, and it gets worse the older I get. I will admit I was apprehensive about MAX6 at first, and that apprehension is the whole reason I wrote this article.
I know the biggest asset to Hurco customers is familiarity and ease of use. My fear at first glance was that we had traded that away for something too complicated, more sizzle than steak. After a few minutes of instruction, though, I saw that everything I am used to is still there, and that many things I used to dig for, like Stock Geometry, are now at the forefront. I just found myself programming like normal. The new interface got easier with every touch, and more than once I caught myself thinking, "Why didn't we put that there before?"
My last concern was customization. With this much control over layout, orientation, and what shows when, how does that work across shifts or between different operators? The answer is user profiles. When you log in as you, your preferences are applied and the control looks and feels exactly the way you left it.
I am a loyal and passionate WinMax user. All I ask is that you keep an open mind about MAX6. Contact your local Hurco distributor for a demonstration, or better yet, get your hands on the control and try the things in this article yourself. I think you will quickly find that MAX6 is familiar, that it is easy to use, and that the things that gave you pause when you first saw it become the things you enjoy most. There is a lot more steak here than sizzle.
See MAX6 in person
Find a Distributor